Step 1 - Preparing the Wall
Create a new document in Photoshop. Set the width on 600 pixels, height on 764 pixels, then press OK.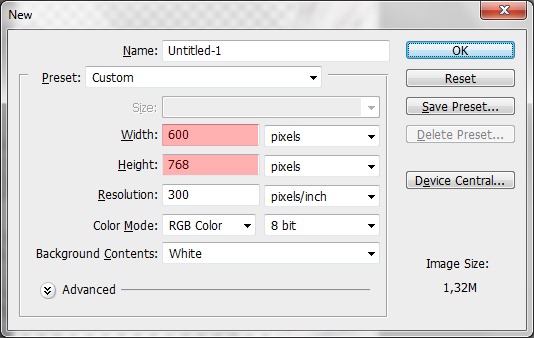
Step 2 - Bending of the Wall
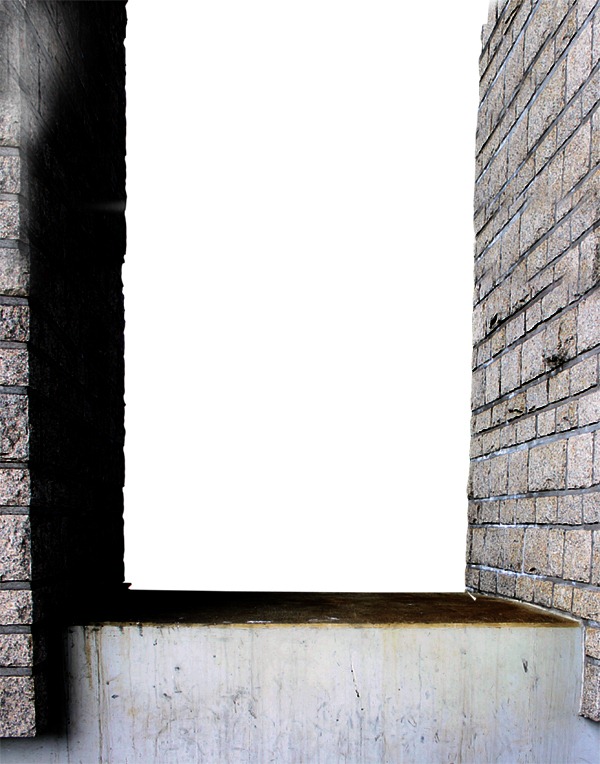
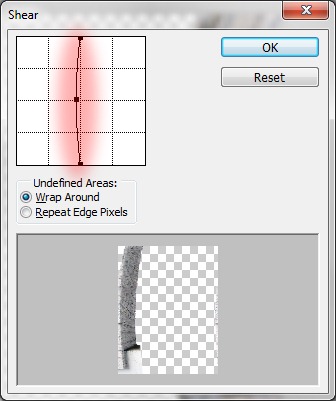
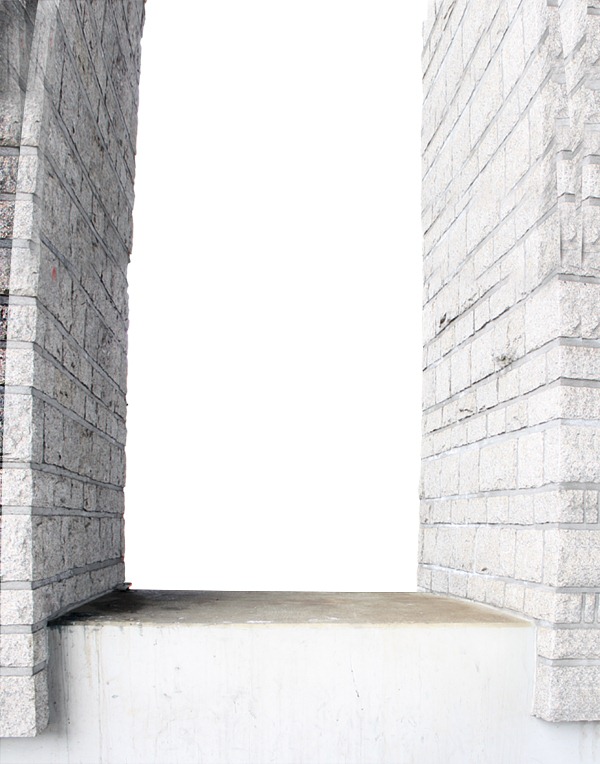
In this step you will bend the wall. It gives the picture bit claustrophobic feel which will evoke the mood of the picture better. Click on the layer BACKGROUND LAYER. Grab the Marquee Tool (M) and select the left part of the wall. Press Ctrl + C to copy the selection and Ctrl + V to paste it. Then press Ctrl + D to deselect it.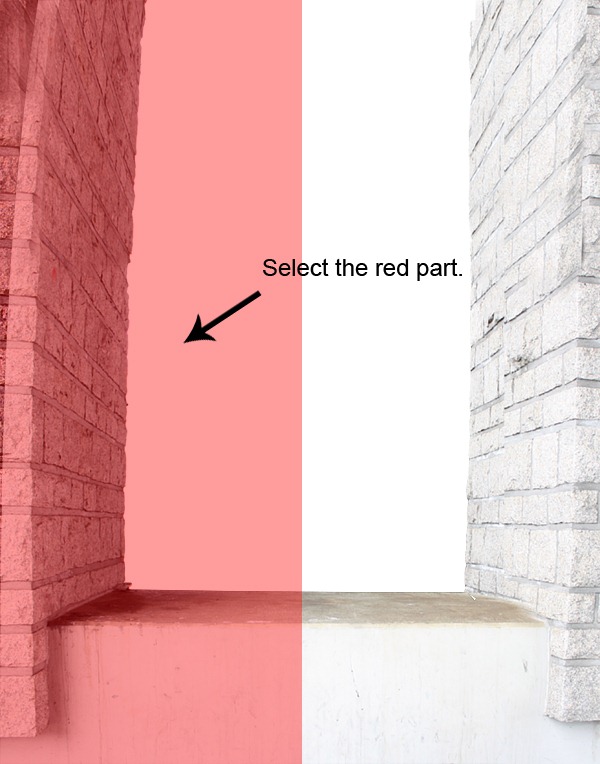
Step 3 - Adjusting the Left Wall
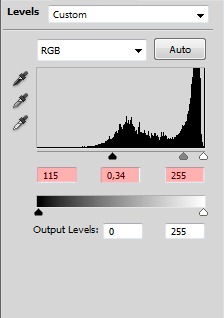
The wall is too bright again. You'll fix it now. Add new adjustment layer Levels above the LEFT BEND. Set the Input Levels as it is shown below and create Clipping mask from this layer.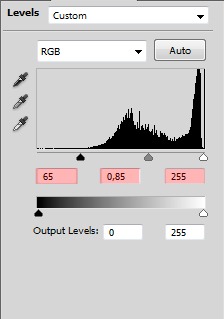

Step 4 - Adjusting the Right Wall
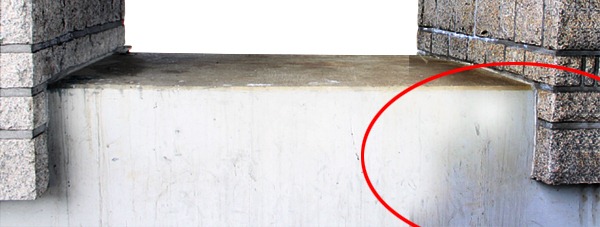
The right part of the wall should be darker too. Add new adjustment layer Levels above the layer RIGHT BEND and set is as shown below.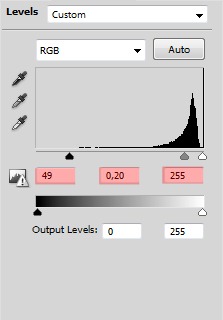
Step 5 - Adjusting the Bottom Part
The bottom part is still too bright. To fix it add new adjustment layer Levels and set it as on the picture below.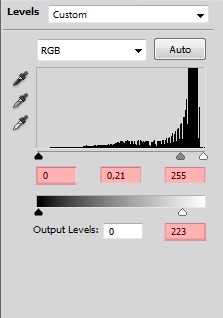
Step 6 - Retouching of Vertical Lines
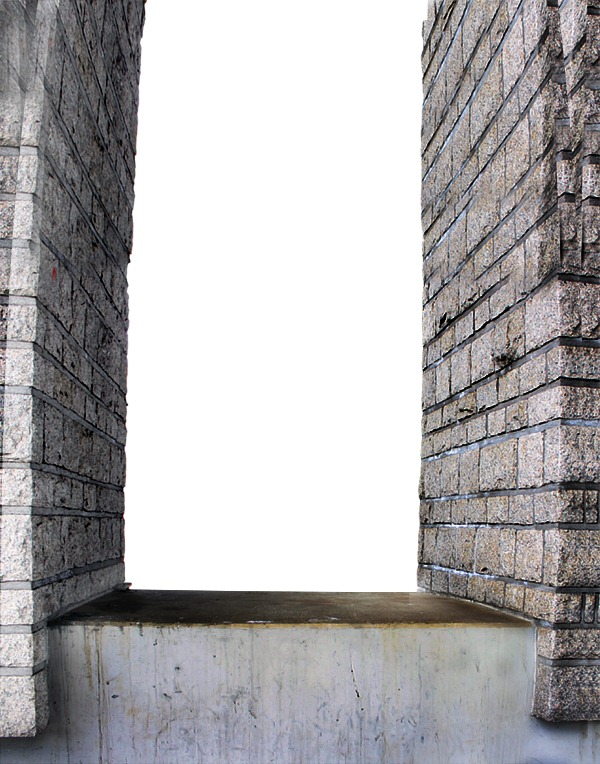
As you can see on the picture above it's necessary to blend parts of the wall correctly. There are three main parts which need to be fixed - vertical lines, horizontal lines and the stone itself. To do that you will use Stamp Tool (S). If you're not familiar with this tool I would recommend you to take a look e.g. at this video tutorial or write "stamp tool" in google or youtube and you'll find tons more. It's a really powerful tool in Photoshop and it's a pity to don't use it.Before you start I'd like to recommend you one think - change the clone source quite often. If you won't do it you get repetitive pattern which doesn't look realistic. As I said before first of all you will fix the vertical lines. They are badly visible and unclean in the upper parts of the wall. Create a new layer and name it VERTICAL LINES. Grab the Stamp Tool (S), pick some soft round brush and set the Opacity and Flow on 100%. below you can see what you should retouch.

Step 7 - Retouching the Horizontal Lines
Now it's time to add and clean the horizontal lines. On the picture below there are highlighted parts of the picture where you should add the lines.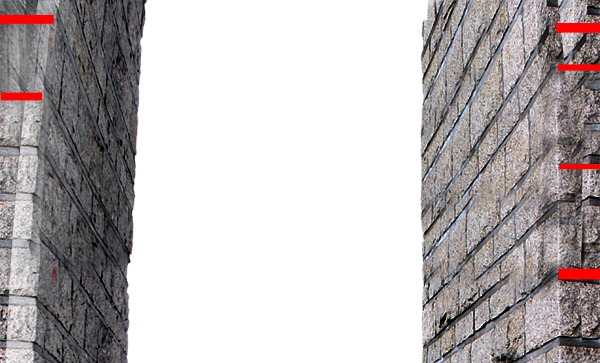
Step 8 - Retouching the Stone
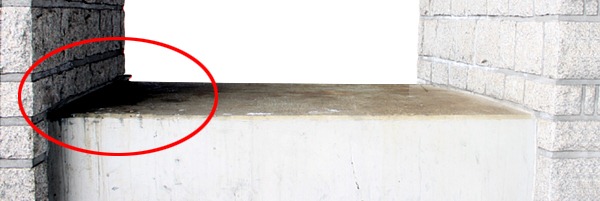
There are still visible transition between each layers. You'll fix it in this step. below there are circled areas which should be retouched. Look at the quick video again to get the idea how to retouch these parts. Create a new layer RETOUCH STONE and do it.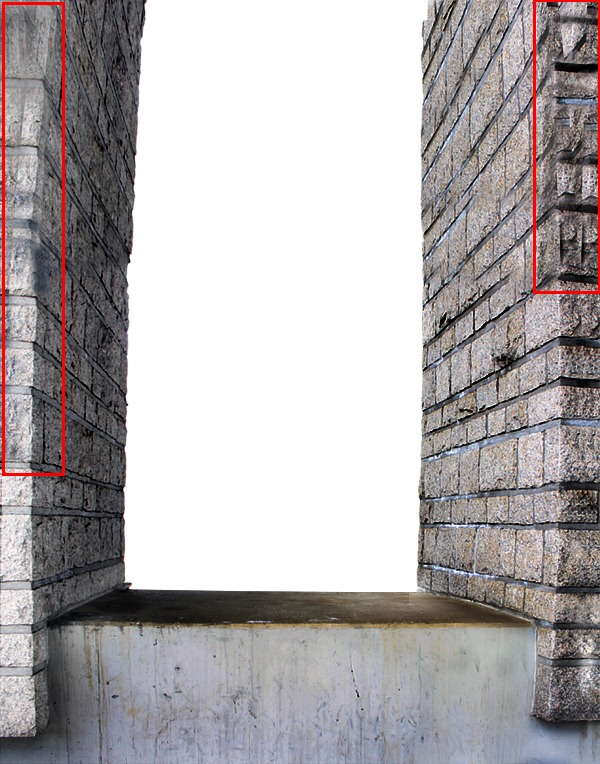
Step 9 - Cleaning the Lines
There are still some lines which need to be fixed. You can see them on the picture below. To clean them up use the same process like during the Step 7 - Cleaning the Horizontal Lines.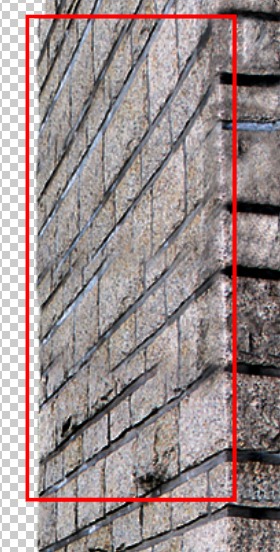
Step 10 - Sharpening the Retouch
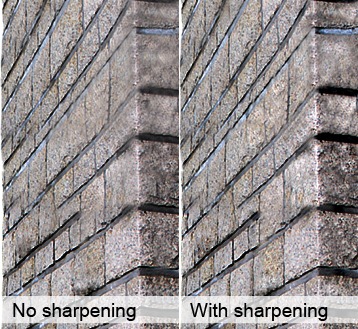
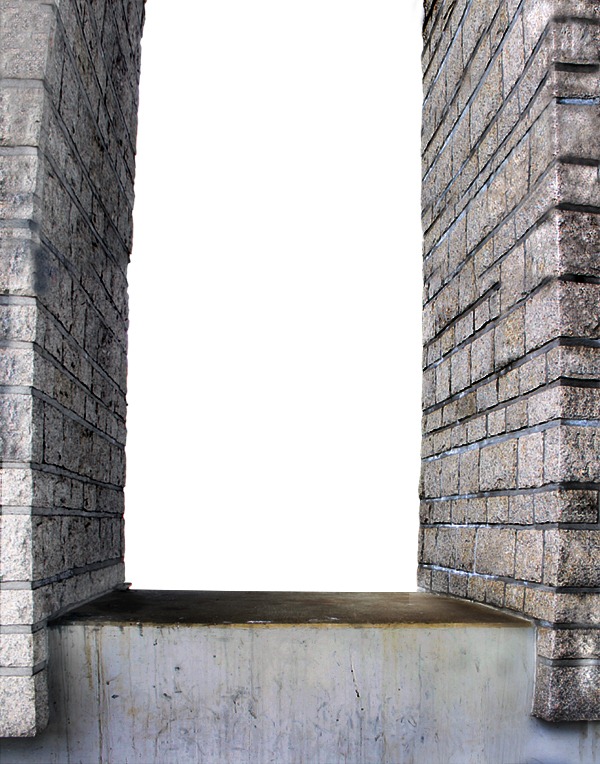
Sometimes when you retouch big parts of the image the final result can become bit blury and dull. You can easily fix it by gently sharpening. If you think it's necessary to sharpen your retouche click on the layer you want sharpen. Then go to Filter > Sharpen > Unsharp Mask ... and set it as it's shown below.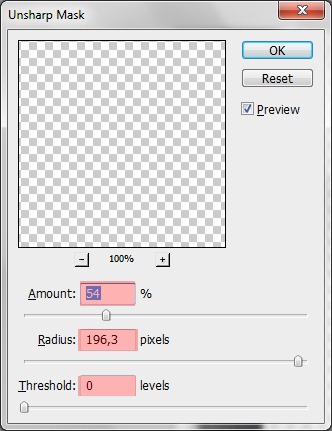
Step 11 - Adding Texture to the Floor
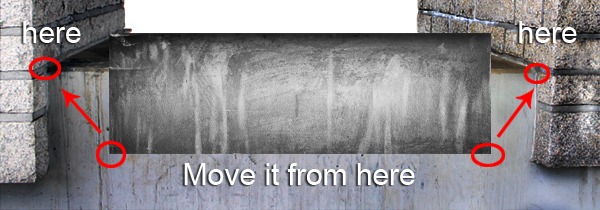
Download the Grunge Textures pack and drag the texture number 4 into the manipulation. I chose this texture because it has lines which help to highlight the focal point of the manipulation - the man. Name the layer FLOOR TEXTURE and place it on the top of the layers. Rotate and resize the texture as you can see below.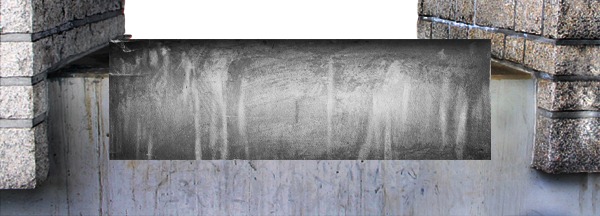


Step 12 - Adding the Sky
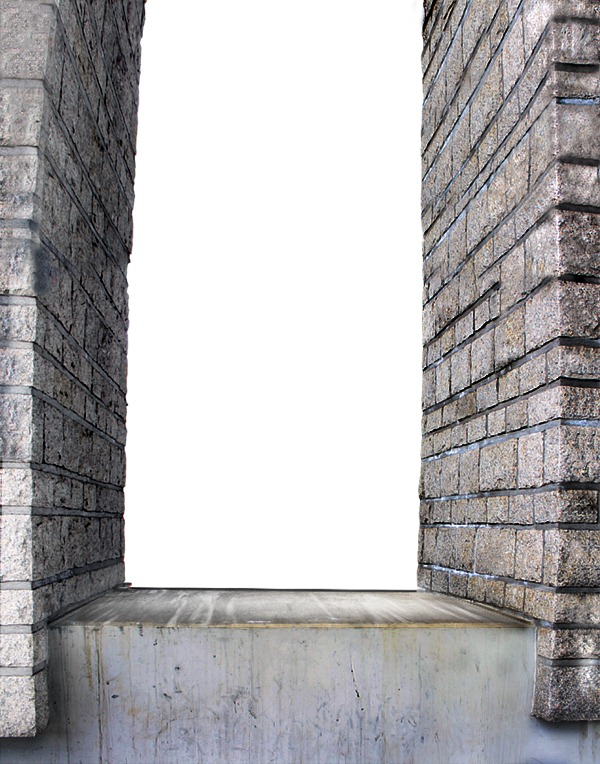
Download the picture of the sky and drag it into the manipulation. Place the layer under all the layers and name it SKY. Press Ctrl + T and resize it on proper size. Create a new adjustment layer Hue/Saturation above the SKY and set the value Saturation on -100. Create Clipping Mask from this layer.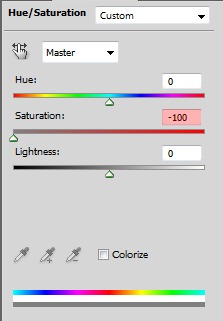
Step 13 - Adding the Wave
Unfortunately the stock photo of the wave is no longer available on the sxc.hu but you can download quite similar photo here. Drag the photo into the manipulation and place it above the SKY. Name the layer MAIN WAVE. Add new vector mask to the layer. You can find the button Add vector mask on the bottom palette Layers left to the button Create new fill or adjustment layer.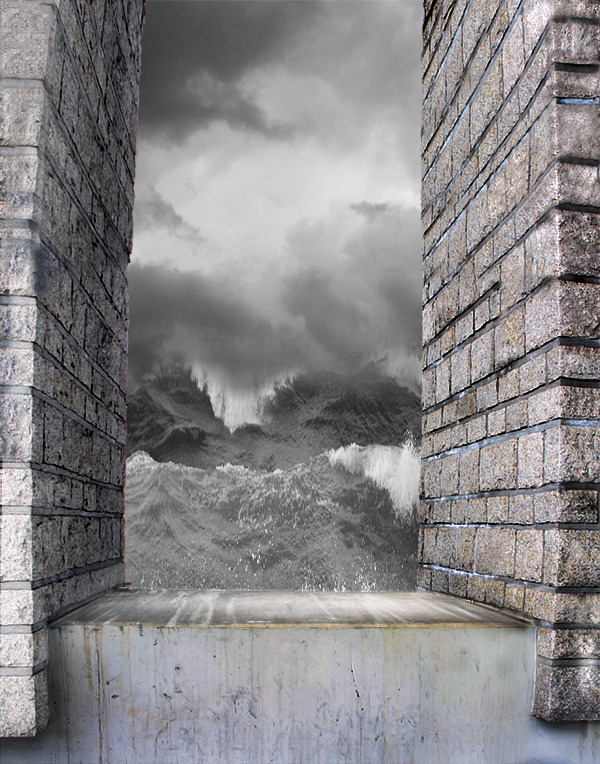
Step 14 - Adding the Water Splashes
The wave would look better if it has more details. You can create them by adding the water splashes. Download this picture and drag it into the manipulation under the layer MAIN WAVE. Name the layer BIG SPLASH. To extract the splashes easily we will play with Channels a little. But first of all make all layers except the BIG SPLASH invisible. To do that simply click on the eye icon on the left side from the each layer.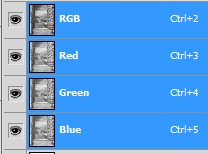
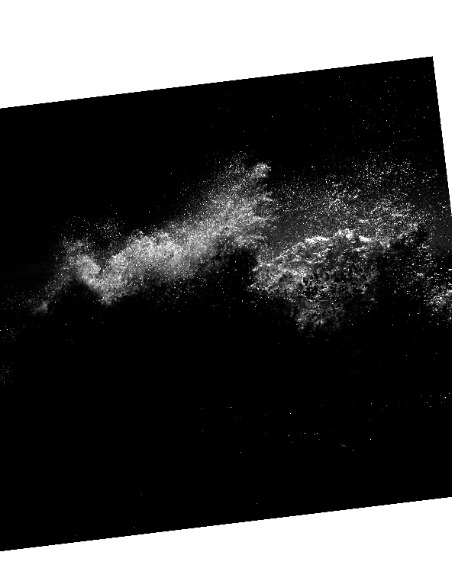
This cause that the sky and some of the water disappear.
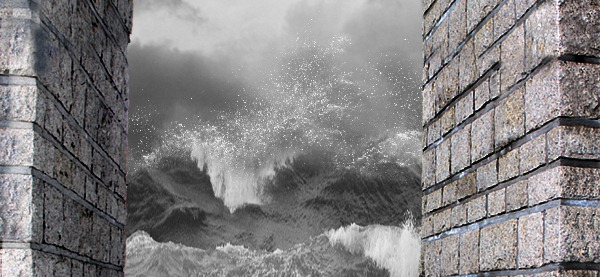
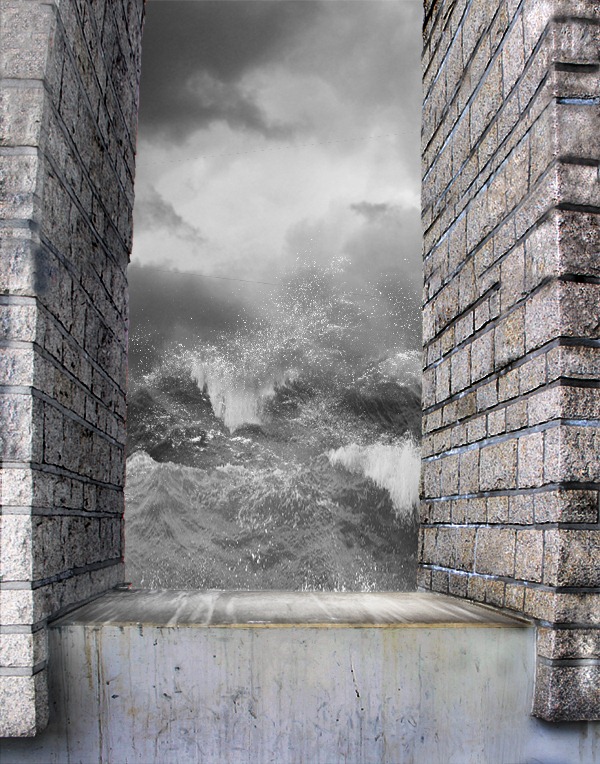
Step 15 - Splash Brushes
The bottom part of the waves would look better if it has more details. You add them by painting more water splashes. Download these brushes and install them into the Photoshop. If you don't know how to install brushes you can take a look at this tutorial. Grab the Brush Tool (B) and select one of the brushes you've just installed. Now Alt click on some light grey color of the waves (this works the same way as Eyedropper Tool) and pait few splashes.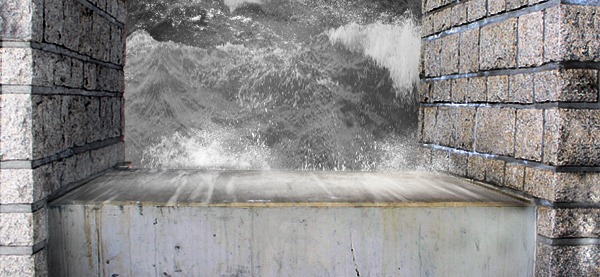
Step 16 - Adding Water on the Floor
There should be some water on the floor. To add it drag the photo with the wave into the manipulation once again. Place it on the top of your layers and name it e.g. WATER ON THE FLOOR. Press Ctrl + T and resize it to get something similar to the picture below.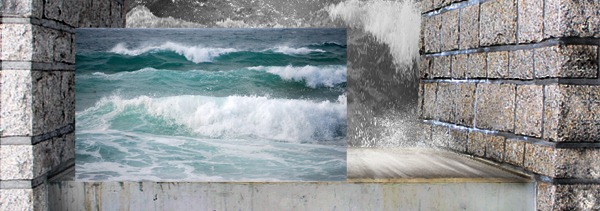
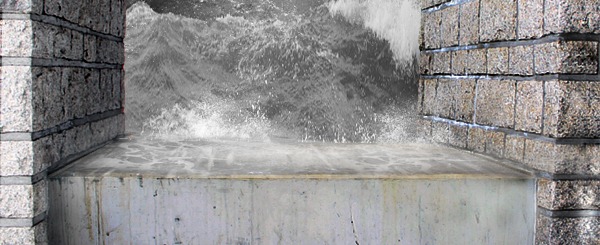
Step 17 - Edge of the Wall
As you might see the edge between the floor and upper part of the wall is too brown and doesn't fit to the rest of the manipulation. To fix it add new layer on the top of your layers and name it GREY EDGE. Grab the Brush Tool (B), select soft round brush and pick some mid grey color. Paint line over the edge. Then change the Blending Mode of this layer from Normal to Color. Below you can see how the layer looks with Normal and Color Blending Mode.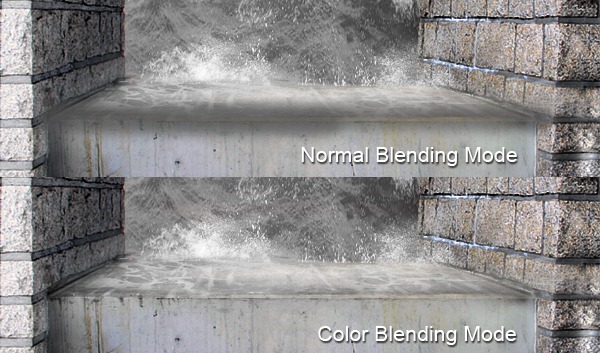
Step 18 - Adding the Man
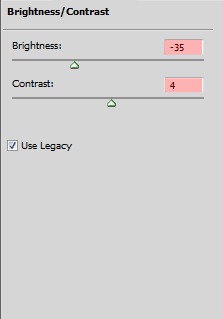
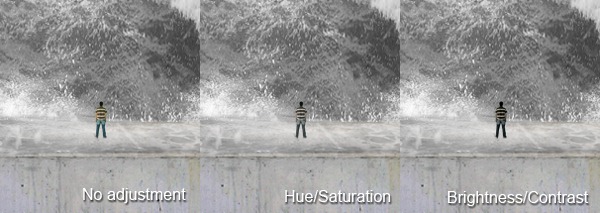
Download the photo of the man, cut out the background and drag into the manipulation. Place the layer on the top of all layers and name it MAN. Man doesn't fit to the picture well right now. He has very low contrast and is too saturated. To lower the saturation add new adjustment layer Hue/Saturation and set the value Saturation on -70. Create Clipping Mask from the layer.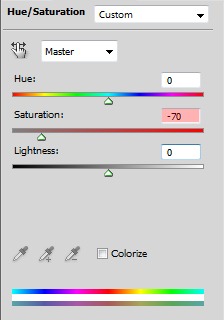
Step 19 - Creating the Focal Point
According to wikipedia.org the focal point is: "In Fine Art, a Focal Point focuses specifically on a point of interest which makes a canvas unique." As I mentioned before the man is the focal point of the image. You want to catch viewer's attention to that spot. To do that you'll add gentle glow arround the man. Thanks to that he will stand out better against the dark background. Click on the layer MAN and then on the button Add a layer style. It's in the bottom part of the Layers palette on the left from the Add vector mask button.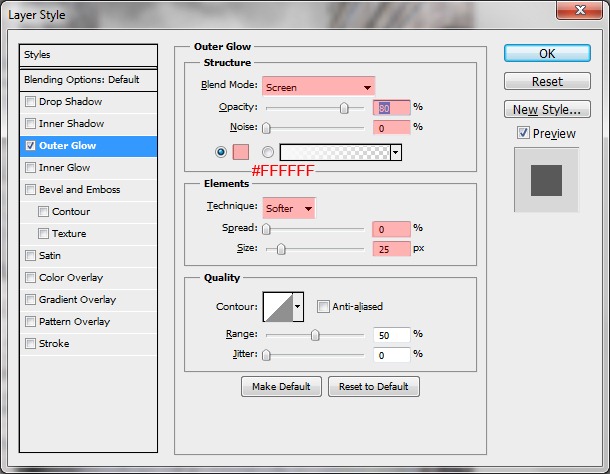
Step 20 - Setting the Global Light
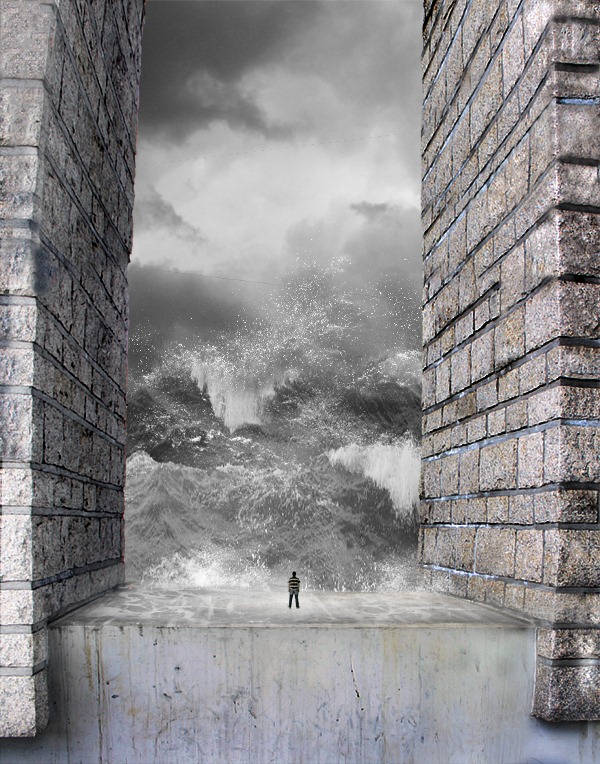
In this step you will set the global light of the whole picture. Thanks to it even more attention will focus on the man. Create a new layer on the top of all layers and name it GLOBAL LIGHT. Grab the Gradient Tool (G), pick #808080 grey color and fill with it the layer. Now go to Filter > Render > Lighting Effects... and set the window as you can see below.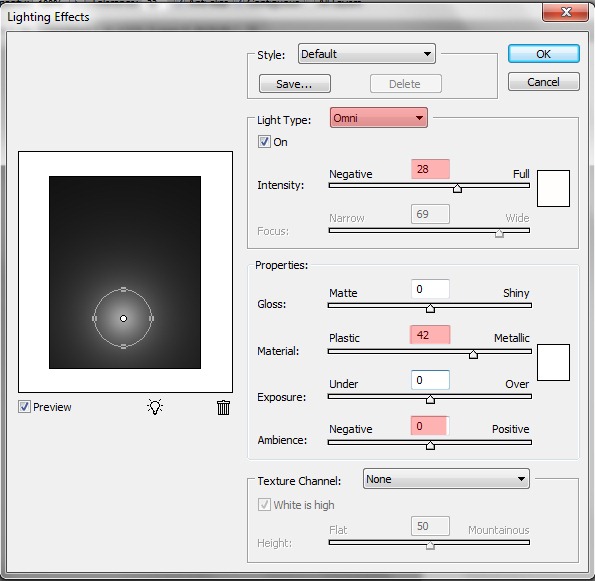
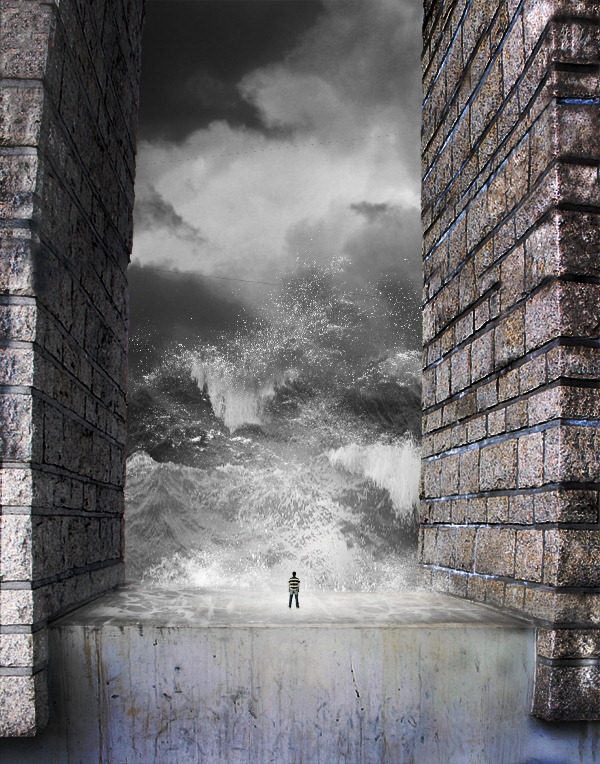
Step 21 - First Color Adjustment
It's time to change slightly the mood of the picture. Add new adjustment layer Color Balance and set it as below.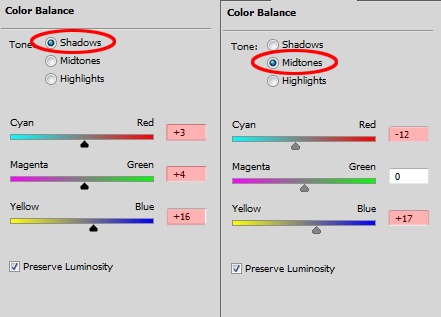
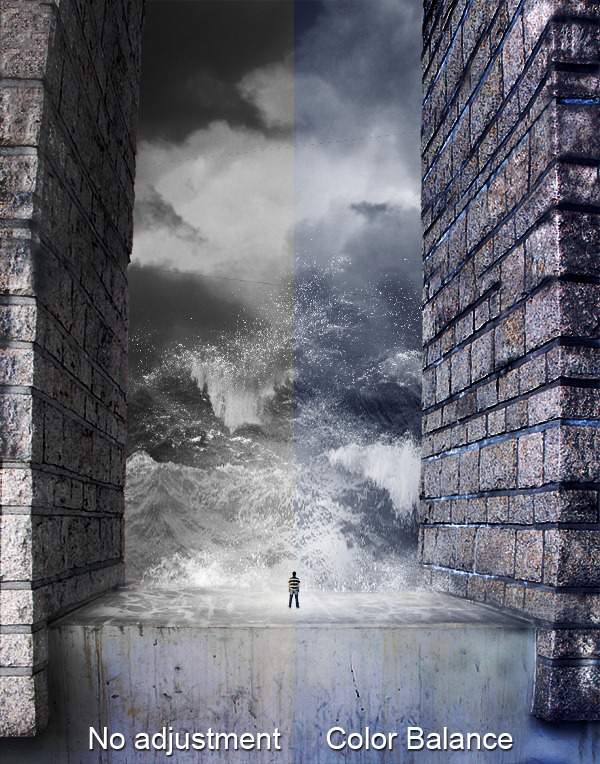
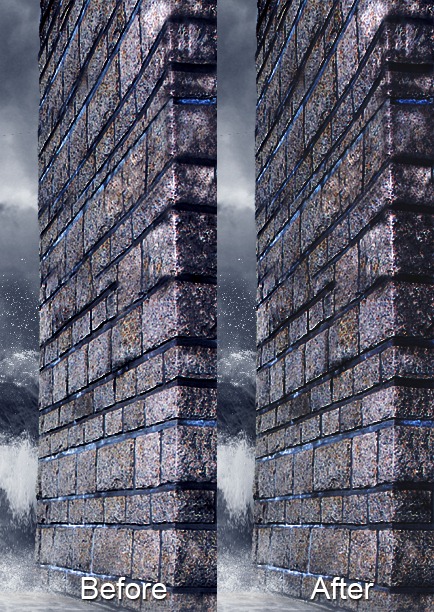
Step 22 - Darkening the Wall
The wall on the right is lighter than the one on the left. To fix it add new adjustment layer Levels on the top of the layers. Set the Input Levels as it's shown below.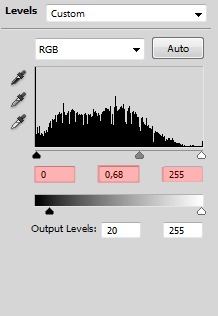
Step 23 - Red T-Shirt
To make the man even more visible we'll make him deep red t-shirt. Add new layer on the top of the layers and name it RED T-SHIRT. Grab the brush and pick #FF0000 red color. Now carefully paint over the man's t-shirt. After you're done change the Blending Mode of this layer on Darken.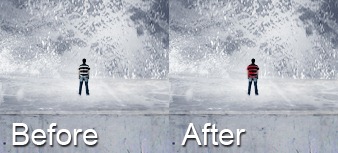
Step 24 - Adding the Moon
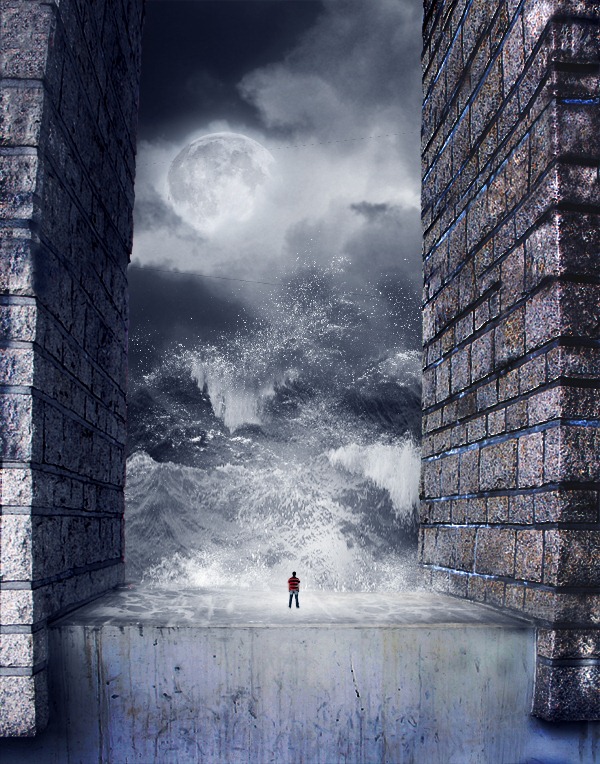
Download the picture of the moon and drag it into the manipulation. Name it MOON and place it on the top of the layers. Press Ctrl + T and resize it on proper size. Change the Blending Mode of this layer on Screen which very easily blends the moon with the rest of the image. Screen Blending Mode works on the principle that it makes black color completely invisible and let the white color completely visible. Other color are visible depending on their lightness. This blending mode is also really useful if you blend lens flare. You can reed more about this (and other) blending mode in this article.But back to the tutorial. To make the moon looking even more realistic lower the opacity of the layer on 70%. It would be also well looking if part of the moon is hidden behind the clouds. To do that add vector mask to this layer. Grab the Brush Tool (B), select soft round brush, pick black color and lower the opacity of the brush on about 40%. Now gently paint over the areas where the moon should be hidden. After this step you manipulation should be similar to the one shown below.
Step 25 - Adding Birds
This is really quick step. Download the bird brushes and install them into the Photoshop. Create a new layer on the top of the layers and name it BIRDS. Grab the Brush Tool (B), select one of the brushes you've just installed, pick some very dark grey or blue color and paint birds similar as on the preview picture.
Step 26 - Reflection under the Man
The man stands in the water. It means he should have some reflections in it. To add them right click on the layer MAN and select Duplicate layer. Place this new layer under the MAN and name it e.g. MAN'S REFLECTION. Change the Blending Mode of the layer on Overlay and lower the Opacity on 30%. Add vector mask, grab the Brush Tool (B), select soft round brush and pick black color. Set the Opacity on 80%. Now paint over the head and body of the reflection. You should get something like this: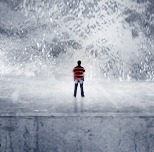
Step 27 - Adding the Textures
In this step you will add two textures to create grungy look. First drag the texture number 3 from the grunge pack you've downloaded few steps back. Place it on the top of all layers and name it TEXTURE 1. Press Ctrl + T and resize it on the size of the manipulation. Change the Blending Mode of the layer on Soft Light and lower the Opacity on 75%. Download this texture and drag it into the manipulation too. Place it on the top and name it TEXTURE 2. Change the Blending Mode on Overlay and lower the Opacity on 30%.Step 28 - Improving the Light
The light still needs some improvements. We'll do them in this step. Add new layer on the top of the layers and name it LIGHT IMPROVEMENT. Grab the Gradient Tool (G) and fill the layer with solid #808080 grey color. Change the Blending Mode of the layer on Overlay. Now grab the Brush Tool (B), pick white color, lower the opacity on 40% and start painting over the areas which should be lighter. Then pick black color and do the same with the areas which should be darker. Below it's shown how the layer should look with the Normal and Overlay Blending Mode. As you can see I made wall bit lighter because of the shining moon and bottom part of the wall and some of the waves darker.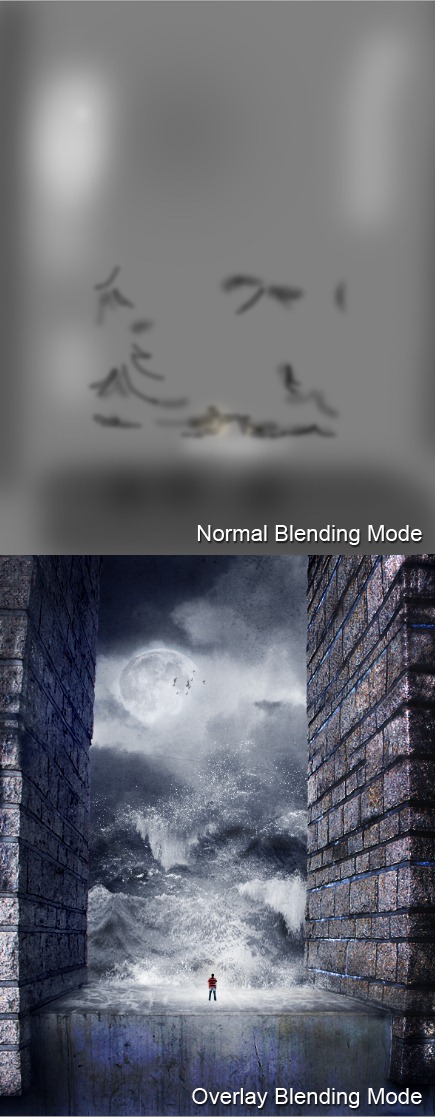
Step 29 - Softening
According to me the picture would look better if it's softer and has little dreamy feel. I'll show you little trick how to do that. Grab the Marquee Tool (M) and select the whole manipulation. Press Ctrl + Shift + C to copy the picture merged and then Ctrl + V to paste it. Place this layer on the top of the layers and name it SOFTENING. Now go to Filters > Other > High Pass and set the dialogue as it's shown below. Press OK. Now go to Image > Adjustments > Invert to invert the colors of the layer. Now change the Blending Mode on Overlay. The picture is softer isn't it?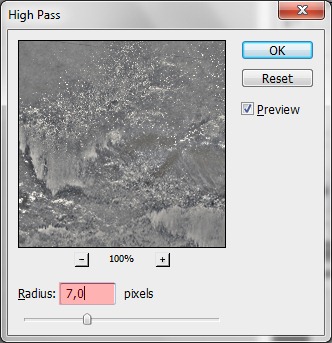
Step 30 - Vignette
The last thing you'll do is adding vignette to the picture. To do that press Ctrl + Shift + C to copy merged image again and Ctrl + V to paste it. Place it on the top of the layers and name it VIGNETTE. Go to Filter > Lens Correction... (might be bit different in different versions of Photoshop) and set the window as you can see below. Press OK.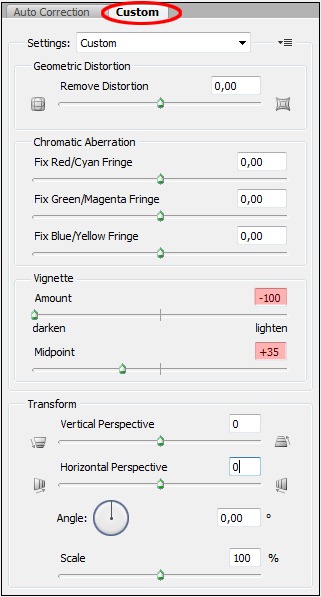
Final Results
Congratulation. You've just finished the manipulation. Thank you for reading the tutorial and hope you've learnt something new and useful during the reading or found inspiration for your new work. I'd like to see your work based on this tutorial in the comments! See you in the next tutorial- Jarka
![00[1] 00[1]](http://photoshoptutorials.ws/images/stories/CreateanIntenseApocalypticPhotoManipulat_EF13/001.jpg)

Tidak ada komentar:
Posting Komentar