Step 1 - Creating The Background
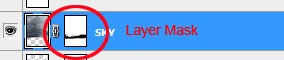
Download picture of background and picture of sky. Create a new Photoshop document and drag these images into the document. Place layer with the sky above the ground and name it SKY. Name the layer with the ground simply GROUND.Add layer mask to the SKY. The button Add layer mask can be found on the bottom part of your palette Layers. If you don´t see this palette simply press F7.

Make sure that the layer mask is active (just click on it) and press B (= Brush Tool). Select some soft round brush, pick black color and start painting over the areas of SKY you want to disappear. If you want more precise details select smaller brush and lower opacity.
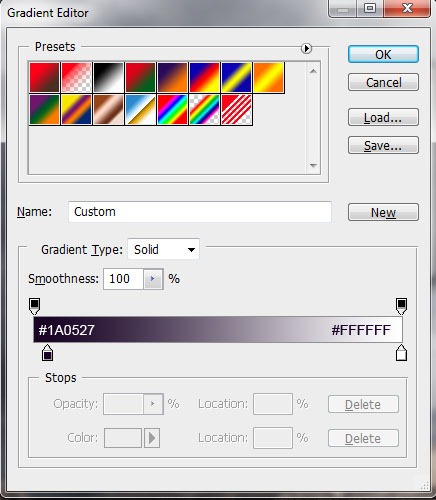
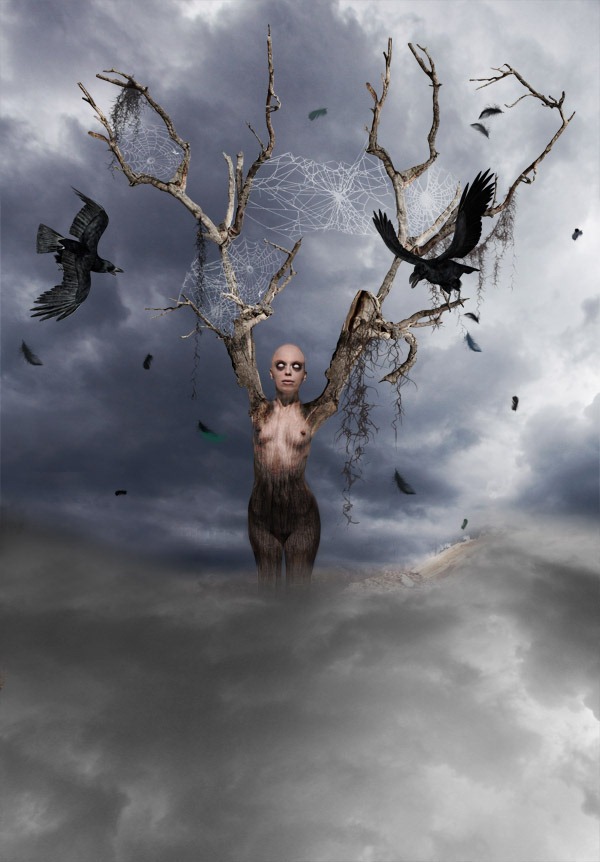
Set Gradient Map as it´s shown bellow:
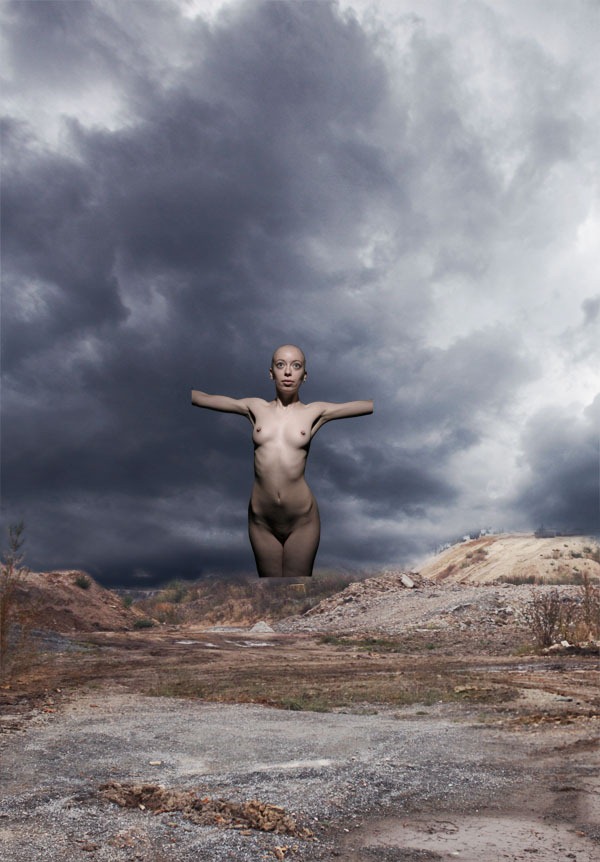
After this step your picture should be similar to this one:

Step 2 - Adding Woman
Download picture of woman and open it in Photoshop. Cut out the background using whatever tool you are comfortable with. I usually use the Lasso Tool (L) but it´s really up to you. After you´re done drag the woman into your manipulation. Drag the layer on the top of your layers and name it WOMAN.Add new adjustment layer Hue/Saturation and set Saturation on -40. Press OK. Now right click on this layer and choose the option Create Clipping Mask. This way the layer affects only one layer under itself, not the whole image.
Your image should look like as it´s shown bellow:
Step 3 - Softening the Shadows
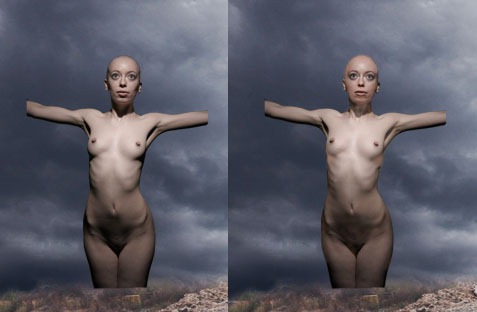
As you can see the woman has really strong shadows on her body which doesn´t fit to the rest of the scene. In this step we will soften them.Add new layer on the top of your layers and name it SOFT SHADOWS. Grab the Brush Tool (B), select some smaller soft brush. Press Alt and select some color of womans´ body. Lower the opacity on about 20% and start painting over the shadows. Change the color of the brush quite often to get realistic result.
Bellow you can see how the woman looks with and without the softening:
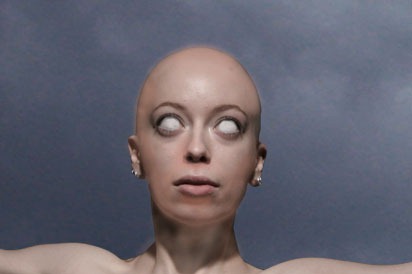
Step 4 - Changing Eyes
As you can see on the final picture the woman has blind eyes. You´ll do it in this step.Add new layer on the top of your layers and name it BLIND EYES. Grab the Brush Tool (B) and select some small, soft, round brush. Pick some color similar to white of her eyes and paint over the irises. To get more realistic result change the color from time to time.
Step 5 - Adding Shadows arround the Eyes
In this step we will add shadows arround her eyes. Create new layer on the top of your layers and name it SHADOWS ARROUND EYES. Press B (= Brush Tool), pick some dark color, lower the opacity on about 40% and paint carefully arround her eyes. Bellow you can see how it should look: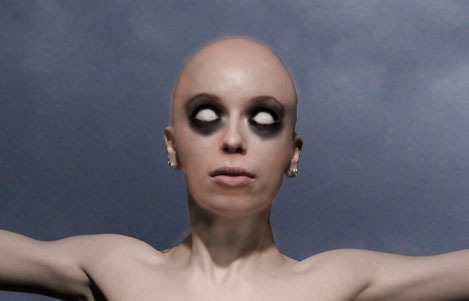
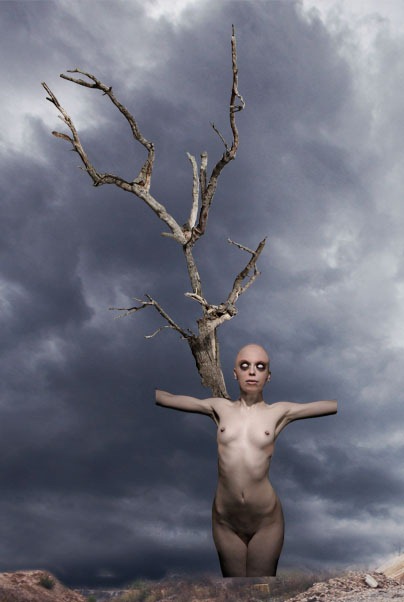
Step 6 - Adding Branches
Download picture of branches and open it in Photoshop. Cut out the background. This may be little boring and time consuming but do it as carefully as possible because more precise you cut it out more realistic the result will be.After you´re done drag the branches into your manipulation. Place the layer under the WOMAN and name it LEFT BRANCH. Press Command + T and rotate the brach in the same direction as you can see on final image. Bellow you can see what I mean:
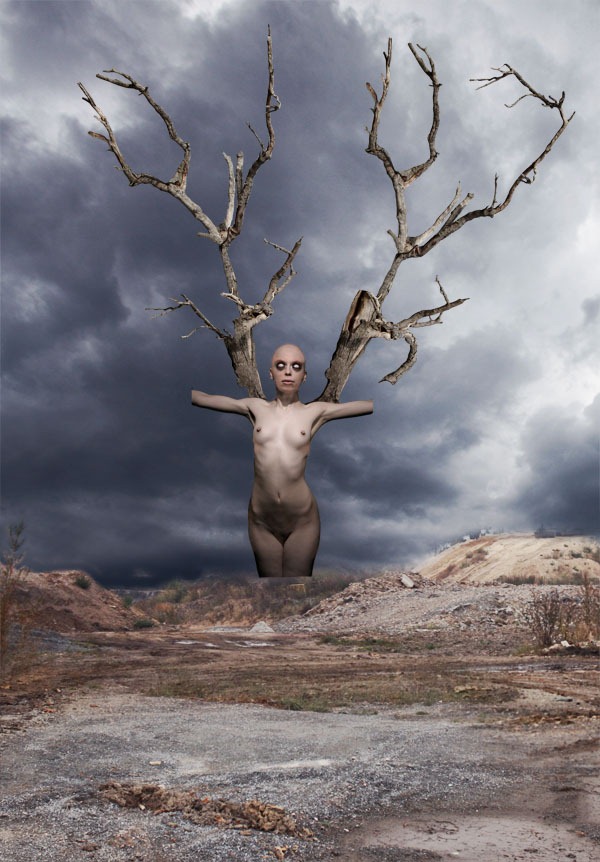
Press E (= Eraser Tool) and erase some branches from LEFT BRANCHES and then different branches from RIGHT BRANCHES. This will add variety and it won´t look like that you use only one stock image (and you don´t need to cut out two pictures of branches).
Bellow you can see how your image should look so far:
Step 7 - Blending Branches
Add layer mask to WOMAN. Grab the Brush Tool (B), select some soft round brush, lower the opacity on about 40% and pick black color. Now start painting over the areas of womans´ hands which should dissapear. Be very careful and work with low opacities and small sizes of brush to get natural result.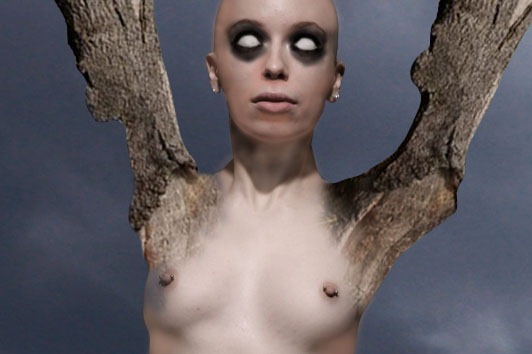
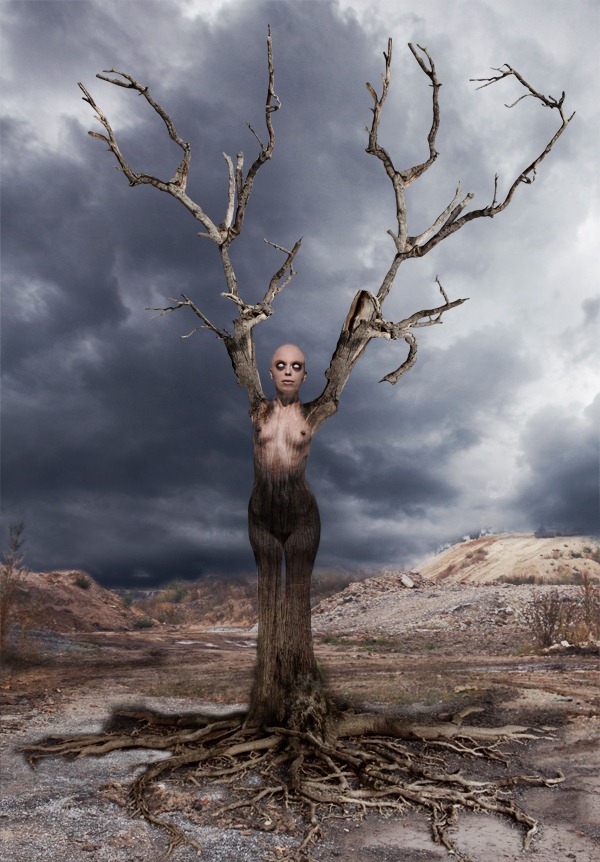
Step 8 - Adding the Roots
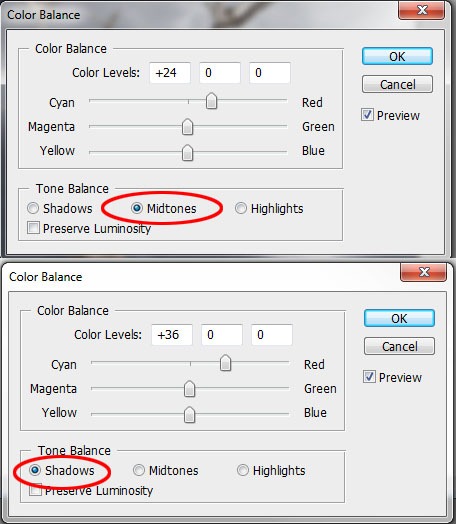
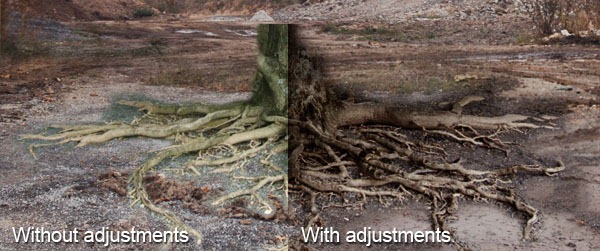
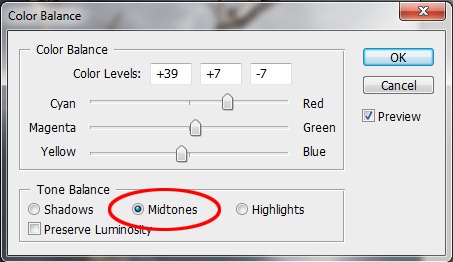
Download the picture of roots and cut out the background. Drag the roots into your photomanipulation, place the layer on the top of your layers and name it ROOTS.Add new adjustment layer Color Balance and set it as shown:
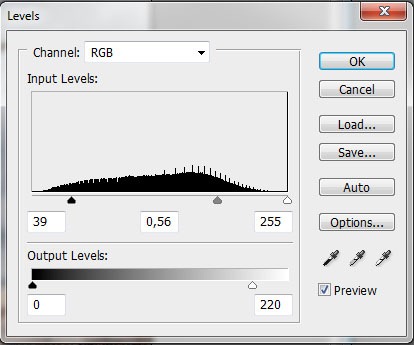
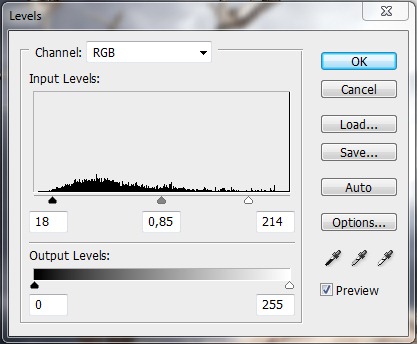
Now add adjustment layer Levels and set it as you can see bellow again. Create clipping mask from the layer.
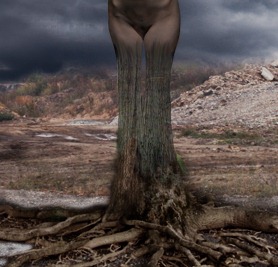
Step 9 - Adding the Trunk
Download the photo of trunk, cut out the background and drag it into your manipulation. Place the layer on the top of your layers and name it TRUNK.Add vector mask to TRUNK, press B (= Brush Tool), select soft round brush, pick black color and start blending TRUNK with WOMAN and ROOTS. Use smaller brush and lower opacity to be more precise and get more realistic result. Bellow you can see how the blending should look:
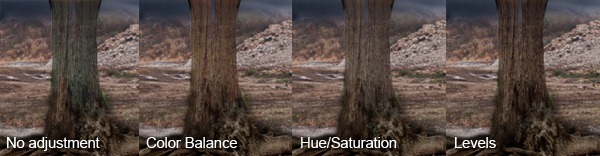
Step 10 - Adjustment of the Trunk
In this step we will fix colors and contrast of the trunk to fit the rest of the image.Add new adjustment layer Color Balance on the top of your layers and set it as you can see here:
Now add adjustment layer Hue/Saturation and set the value Saturation on -40 to lower the saturation. Create clipping mask again because you want to affect TRUNK only.
Add one more adjustment layer - Levels and set Input Levels on 18; 0,85; 214. Don´t forget to create clipping mask.
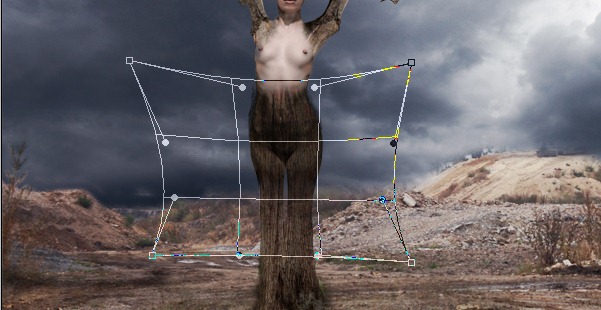
Step 11 - Adding Texture over Women´s Body
In this step we will add texture to women´s body.Duplicate the layer TRUNK and place it over the bottom part of her body. Name the layer e.g. BOTTOM TEXTURE and change Blending Mode on Overlay.
Add vector mask to this layer, grab the Brush Tool (B). select soft round brush and pick black color. Lower the opacity of the brush and start blending the texture with body. Change the size and opacity of the brush from time to time to get realistic result.
The texture of the trunk doesn´t fit well to the body, it should be little curved. To fix that go to Edit > Transform > Warp and addapt the texture to the shape of the body.
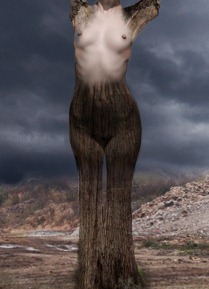
Bellow you can see how your image should look so far:
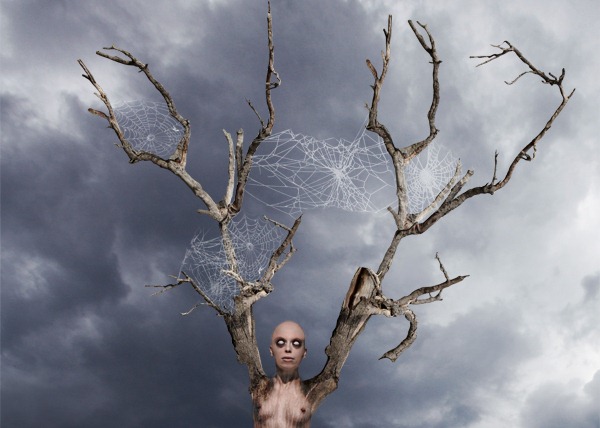
Step 12 - Adding Spider Web
In this step we will add spider web. It´s nice detail which evokes that the treewoman has stood there for a very long time.Download the spider web brushes. Create new layer on the top of your layers and name it SPIDER WEB. Grab the Brush Tool (B) and install new brushes you´ve just downloaded. If you don´t know how to install new brushes look at this tutorial. Pick white color, set the opacity on about 80% and paint the spider webs.
Grab the Eraser Tool (E) and erase the parts of the webs which lead to empty space.
Step 13 - Adding the Spanish Moss
Spanish moss is another nice detail which evokes old, forgotten atmosphere. We will add it in this step.Download the spanish moss brushes. Create new layer and name it SPANISH MOSS. Grab the Brush Tool (B) and instal new brushes the same way you´ve installed the spider web brushes. Pick dark green color and paint the moss. Use slightly different colors for each moss. This way it will look realistic because in nature there are not things with the exactly same color.
Look how your image should look after this step:

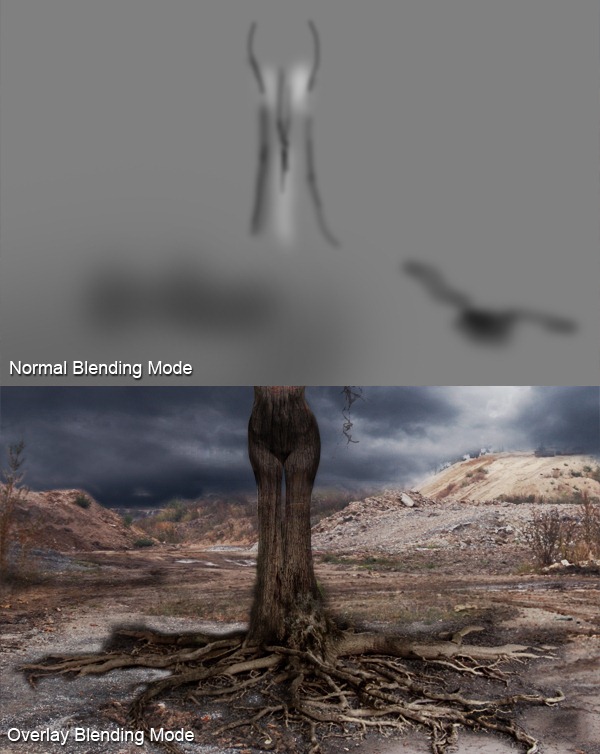
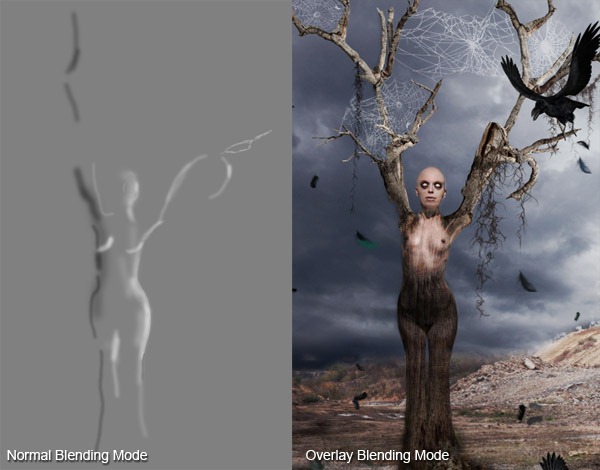
Step 14 - Adding "3D Effect" To The Legs
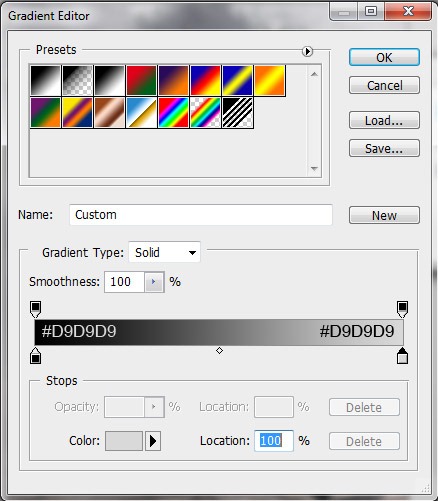
As you can see the texture on woman´s legs is flat which doesn´t look realistic. We will fix it now.Add new layer on the top of your layer. Grab the Gradient Tool (G) and fill the layer with solid #808080 grey color. Change the blending mode of the layer on Overlay.
Grab the Burn Tool (O) and start burning the areas of her legs which should be darker. Then grab the Dodge Tool and lighten areas which should be lighter as it is shown bellow:
Step 15 - Adding the Ravens
Download the picture of ravens. This stock is really great because it´s on transparent background so you don´t have to cut out the background which saves a lot of time.Open the picture with ravens and grab the Marquee Tool (M), select raven you want to use and drag it into your manipulation. Do the same with all ravens and place them as you can see on the preview picture or whatever you like.
Step 16 - Adding Small Feathers
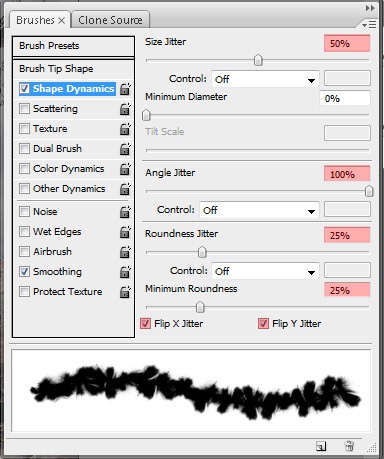
To add feathers you need to download these brushes and install it into Photoshop. To get variety which will look realistic you need to set dynamic of the brush. In Photoshop CS3 you can find the button Brushes left to the Navigator.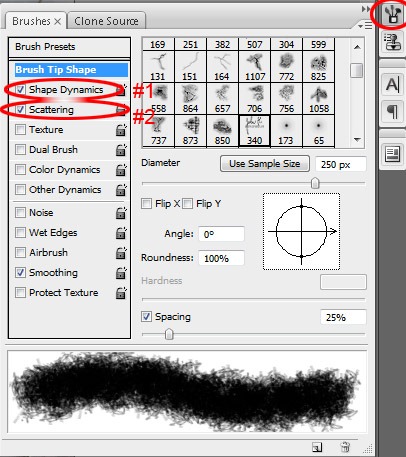
Now set Scattering as it´s shown bellow:
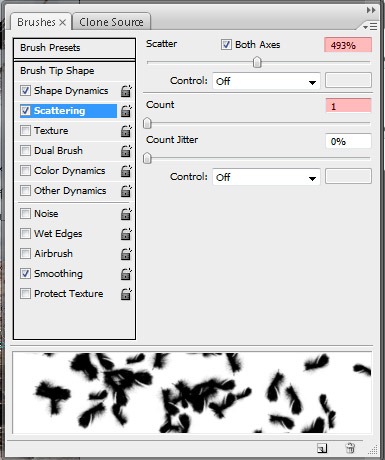
After this step your manipulation should be similar to this one:
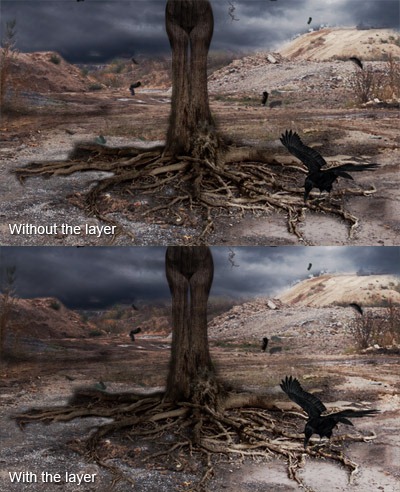
Step 17 - Changing the Light on the Ground
In this step I will show you little trick how to easily change the lights and shadows on the ground so they will fit to the lights of the sky. As you can see there are some lighter and darker parts on the sky and they should reflect on the ground too.Right click on the layer SKY and select Duplicate Layer. Name this new layer LIGHTS ON THE GROUND and place it on the top of your layers. Now go to Edit > Transform > Flip Vertical. Grab the Move Tool (V) and place the layer over the part of the manipulation where the ground is. Press Ctrl + Shift + U to desaturate the layer.
Bellow you can see what to do:
Bellow you can see how the ground looks with and without this layer
Step 18 - Adding Lights And Shadows on the Body
As you can see on the preview picture the lightest part of the picture is the sky on the right side. This will be our light source. In this step we will add lights on the right part of women´s body and shadows on the left part.Add new layer on the top of your layers and name it e.g. LIGHTS ON THE BODY. Grab the Gradient Tool (G), pick #808080 grey color and fill the layer. Change Blending Mode on Overlay. Grab Dodge Tool (O), set the Exposure on 50% and paint over the areas which should be lighter. Than gran Burn Tool and paint over the areas which should be darker as it´s shown bellow:
Step 19 - Adding Lights To The Sky
It this step we will make the light source bit stronger. Add new layer on the top of your layers and name it LIGHT SOURCE. Grab the Brush Tool (B), select some big, soft, round brush, pick white color and lower Opacity on 50%. Now paint a dott over the lightest part of the sky. Bellow you can see what I mean: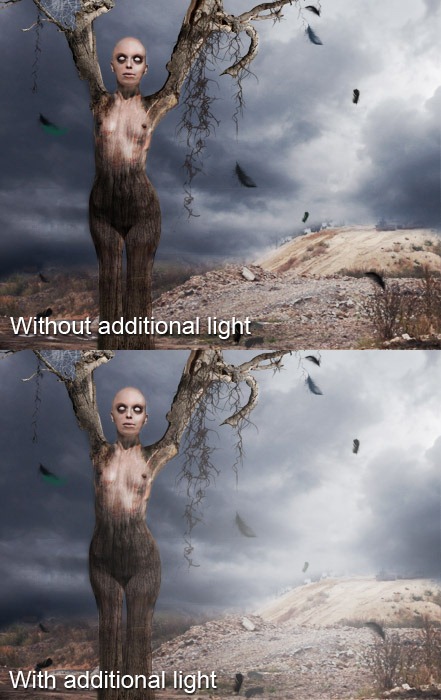
Step 20 - Adding Lens Flare
To increase the light little more we will add lens flare. Add new layer on the top of your layers and name it LENS FLARE. Grab the Gradient Tool (G) and fill the layer with solid black color. Now go to Filter > Render > Lens Flare... and choose type of the flare you like. I used 105 mm Prime. Your flare should not touch the borders because you´re moving it later and it wouldn´t look realistic if you have only part of the flare.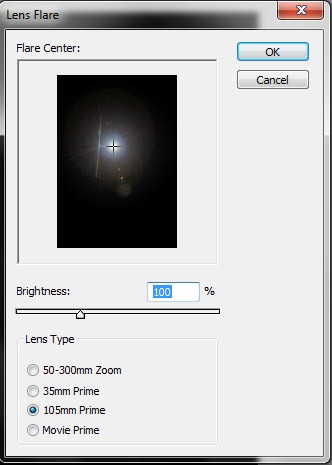
To get more realistic result you can rotate the flare or lower the opacity. Bellow it´s shown how your manipulation should look:
Step 21 - Adding the Mist
In this step we will add mist. Mist can be really great element of your manipulation if you want to create mysterious, enigmatic atmosphere.Download the mist brushes (or another which are free) and install them into Photoshop. Add new layer on the top of your layers and name it MIST. Grab the Brush Tool (B), select one of the mist brushes, pick white or light grey color and paint the mist.
To get more realistic result you can play with opacity and different Blending Modes. I used opacity set on 80% and Normal Blending Mode.
Step 22 - First Color Adjustment
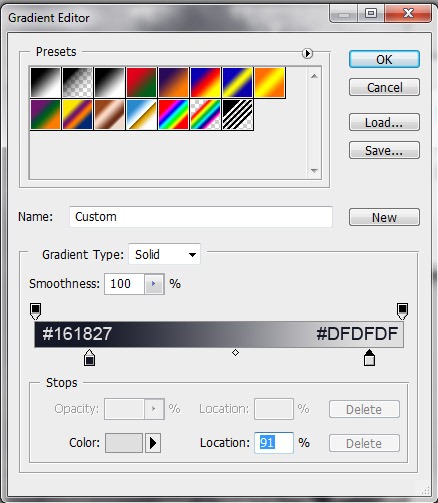
Almost all parts of the manipulation are already placed. In this step we will start with color adjustment.Add new Adjustment Layer Gradient Map on the top of your layers and set it as it´s shown bellow:
Add one more Gradient Map and set is as this:
Now add Adjustment Layer Levels and set the Input Levels on 14; 1,19; 226. Press OK.
Add Adjustment Layer Color Balance and set Midtones and Shadows as it´s shown bellow:


Step 23 - Adding Vignette
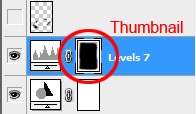
Vignette is nice way how to keep viewer´s eye inside the picture. To create it add new Ajustment Layer Levels on the top of your layers. Set Input Levels on 0; 0,48; 255 and press OK.Grab the Gradient Tool (G) and fill the Thumbnail of the layer with solid black color.
Step 24 - Adding Big Feathers
Another way how to lead viewer´s eye is using of lines. We use this principle by adding big feathers. They also add impression of spatiality.Drag the Brush Tool (B), select feather brush, pick dark blue color and paint feathers as you can see on the preview picture. Make feathers which are closer bigger and these in the distance smaller.
Now we will make the feathers out of focus. To do that you need to add blur effect. Go to Filters > Blur > Gaussian Blur and set Radius on about 1,8 px. Press OK.
After this step your picture should be similar as it´s shown bellow:
Step 25 - Yellow Eyes
In this step we will make the tree woman little more magical by adding yellow eyes. Create new layer on the top of your layers and name it YELLOW EYES. Grab the Brush Tool (B). Select some small, soft round brush, pick yellow color and paint yellow dots over the eyes. Change the Blending Mode of the layer on Color.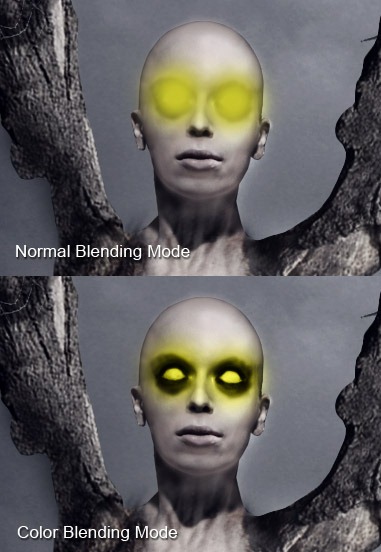
Step 26 - Darken The Sky
According to me the right upper part of the sky is too bright. We will fix it in this step. Add new Adjustment Layer Levels and set Input Levels on 0; 0,92; 255. Grab the Gradient Tool (G) and fill the thumbnail witht solid black color. Grab the Brush Tool (B), pick white color and paint over the areas which are highlighted on the picture bellow: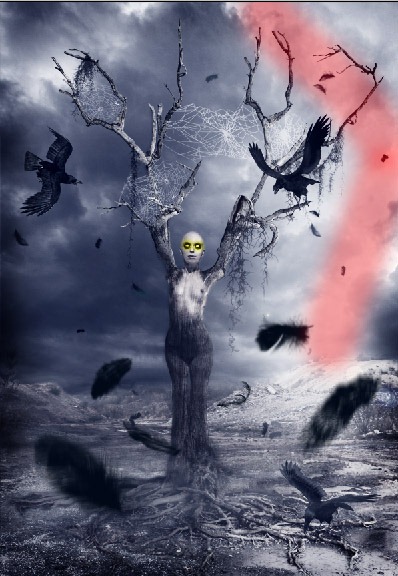
Step 27 - Final Touches
You are almost finished. There are only two things left.First of all add new Adjustment Layer Levels on the top of your layers. Set Input Levels on 4; 0,83; 255. This darken the picture a little.
Grab Marquee Tool (M) and select the whole picture. Go to Edit > Copy Merged and then Edit > Paste. And now go to Image > Adjustments > Auto Color.
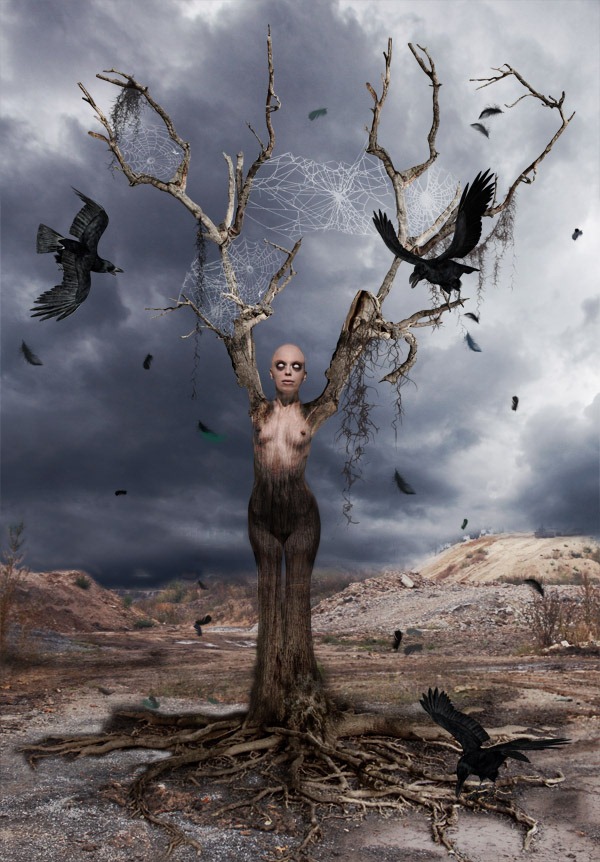
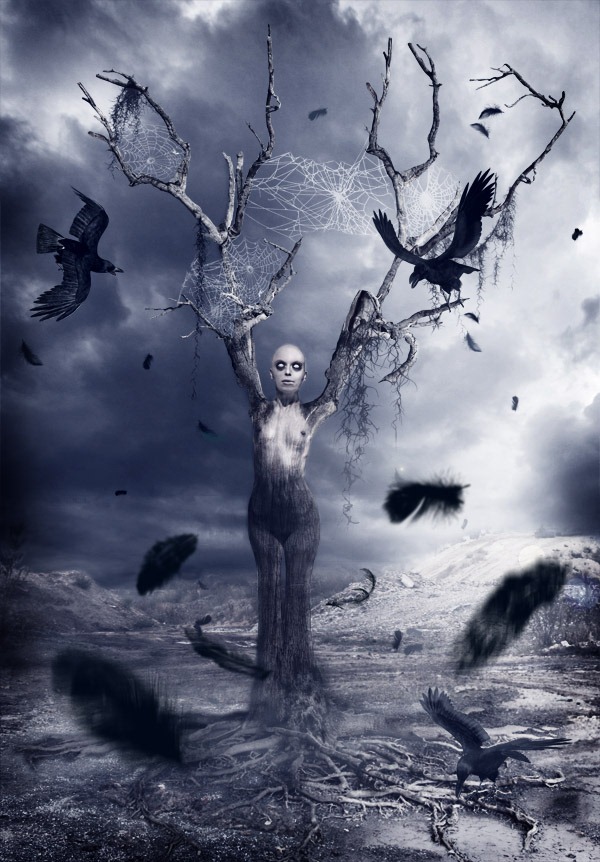
Conclusion
Congratulation! You´ve just finished the tutorial. Hope you´ve learnt something new or found inspiration for your new artwork. I like to see your work based on this tutorial in the comments.![01[1]](http://photoshoptutorials.ws/images/stories/TerrifyingHorrorPhotoManipulation_1436C/011.jpg)
Tidak ada komentar:
Posting Komentar