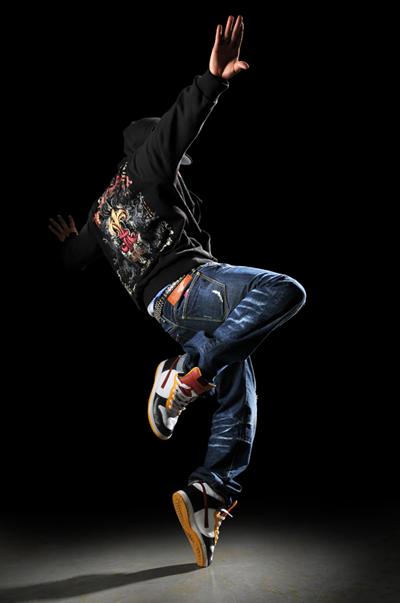
Step 1 – Open the image of the dancer
Load the image of the dancer into Photoshop.
Step 2 – Place the image of the clouds
Choose File > Place, browse for the image of the clouds, then click OK. The image of the clouds will appear in your document window with the transform tool activated. Resize and position the clouds where you like it to appear then press enter on your keyboard to apply the changes. The reason why we use the place command rather than other methods is because the place command will place the image as a smart object (if you are using Photoshop CS2 or newer) to help keep the file size small if you save the document without the
maximize compatibility option.
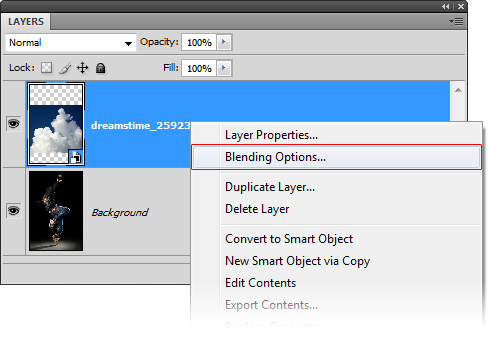
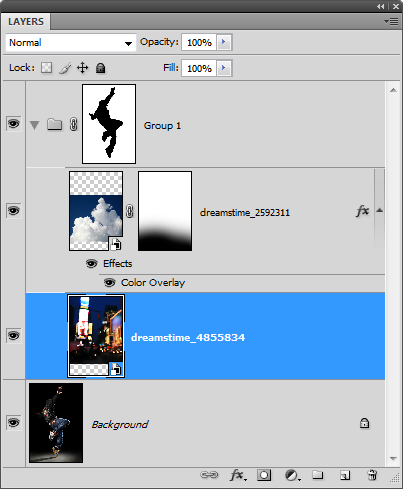
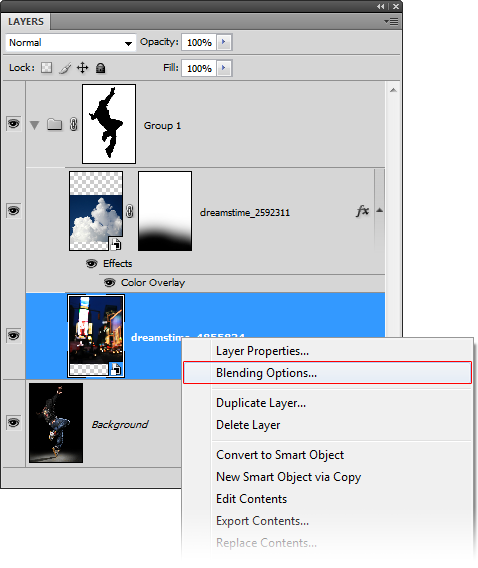
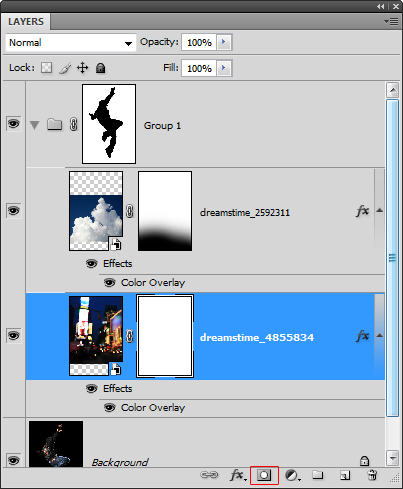
Step 3 – Blend the clouds
Now we’ll make the sky transparent so that only the clouds are visible. Instead of using a mask, we’ll use the blending options. This will help keep the file size small and reduce the number of layers in your document. Right click on the layer of the clouds then choose Blending Options.
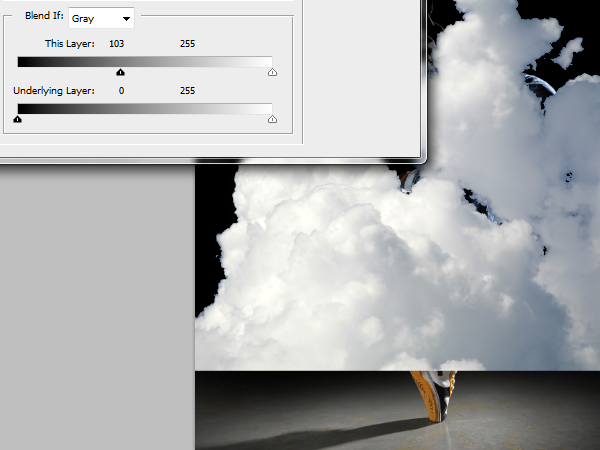
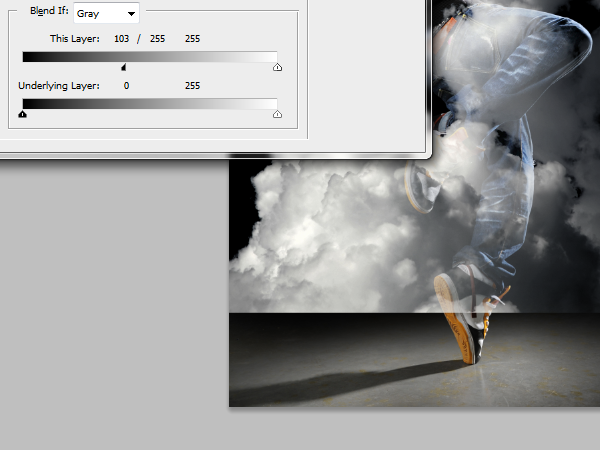
In the blending options, move the black input slider towards the right until the sky disappears.
Hold the alt key on your keyboard and drag the black input slider all the way towards the right. The hard edges of the clouds should disappear and the clouds should have some transparency. Don’t click OK yet.
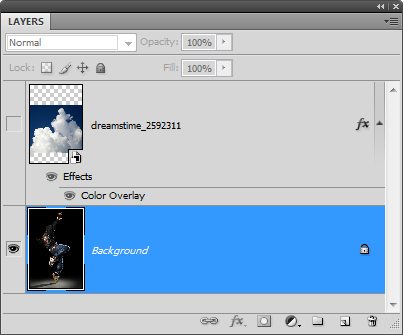
In the same layer style window, click on the Color Overlay option. Choose white as the color then set the blend mode to color. This is a simple non-destructive trick to desaturate a layer using layer styles. Click OK to apply the changes.
Here’s what the image looks like right now. You have just blended the cloud into the background without using any layer masks. We’re not 100% complete with blending the clouds in but we’re going to pause here and continue after we create a mask of the model.


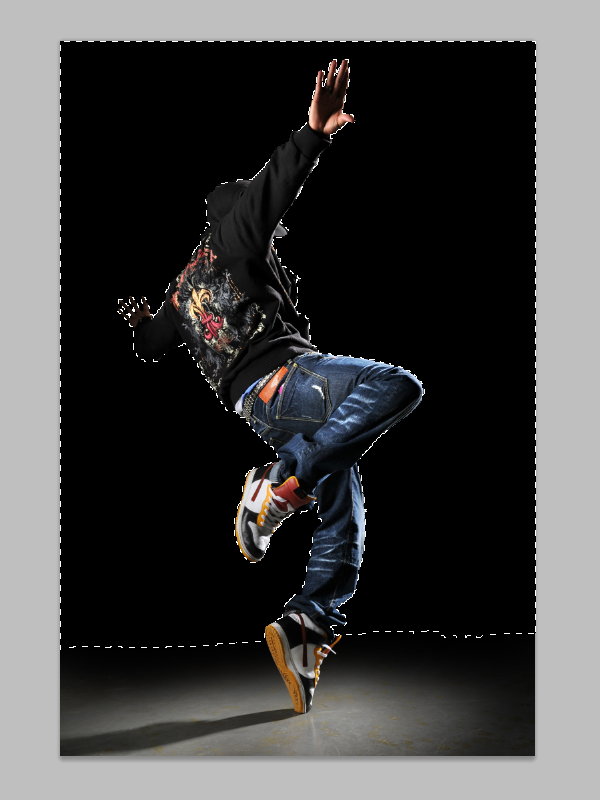
Step 4 – Create an inverse selection of the model
Hide the layer with the clouds then select the background layer.
Select the magic wand tool then set the tolerance to 0 so that the black sweater won’t be included in the selection.
Click on the black area to create a selection of the background. You’ll get most of the background selected.
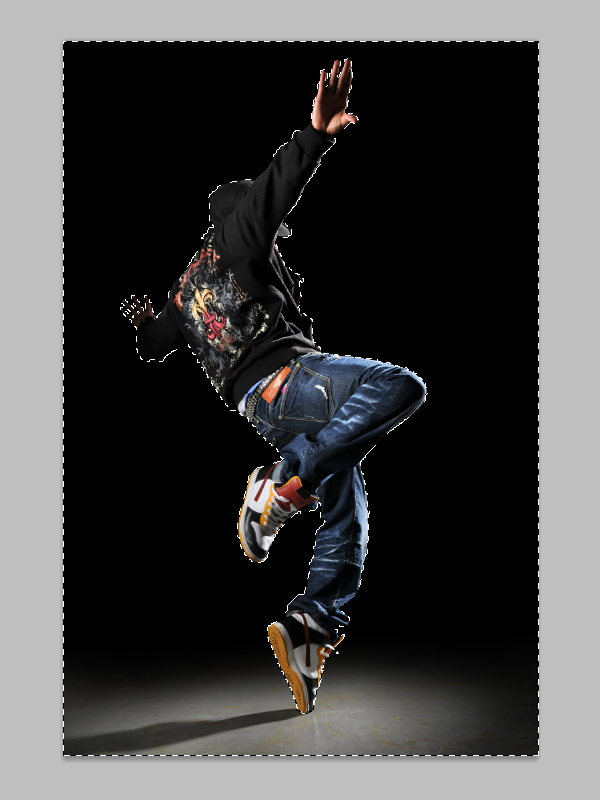
You can continue to add to the selection using the lasso tool. Or, if you’re using Photoshop CS3 or newer, switch to the quick selection tool, to easily add the bottom of the background into the selection.
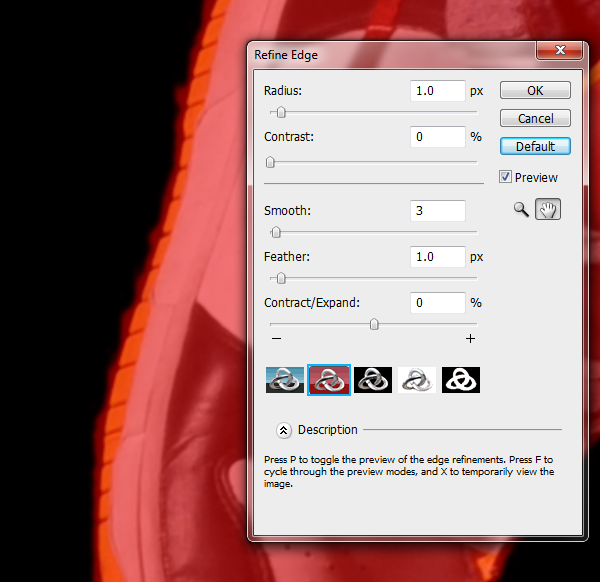
If you’re using Photoshop CS3 or newer, you can use the refine edge tool to enhance the selection. Simply select any one of the selection tools then click on the “Refine Edge” button on the option bar.
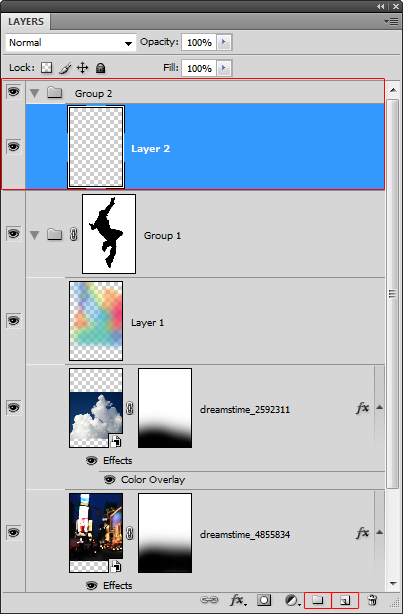
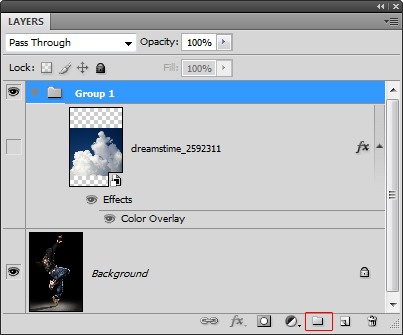
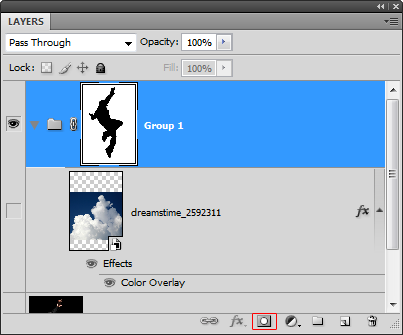
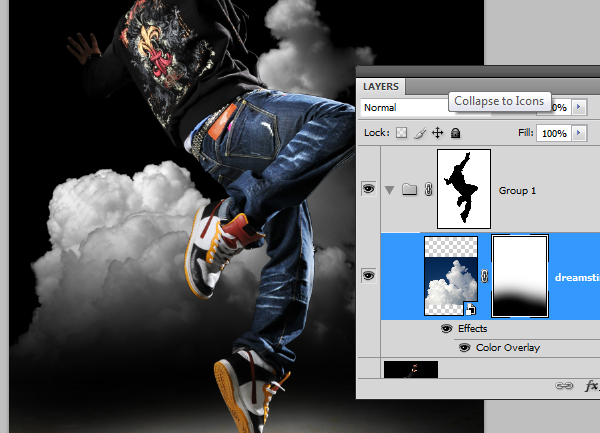
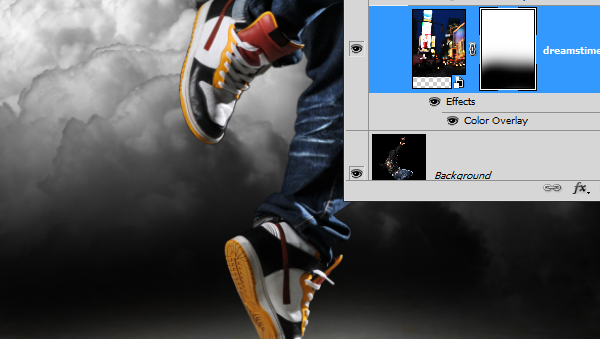
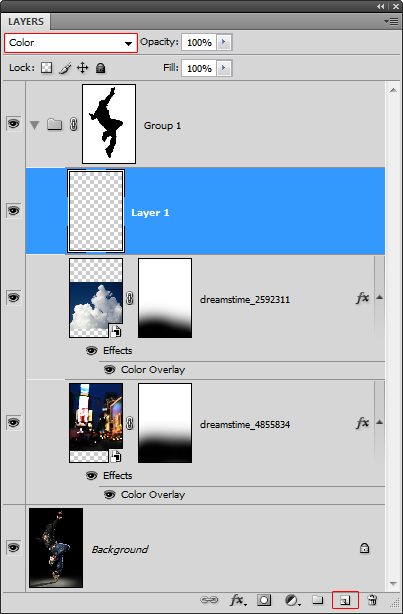
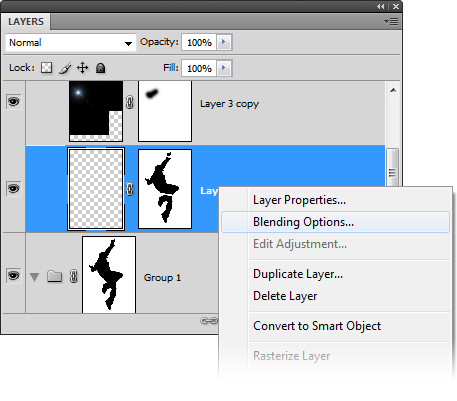
Step 5 – Create a layer mask of the selection on a group
By applying the mask in a group instead of a layer, we can simply place any layer we want in this group and it will only be visible behind the model. This saves us from having unnecessary layer masks.
Select the layer of the clouds then click on the

button in the layers palette.
With the group selected, click on the

button to add a layer mask. It will automatically apply your selected area into the layer mask. Anything we put inside this group will appear around the model.
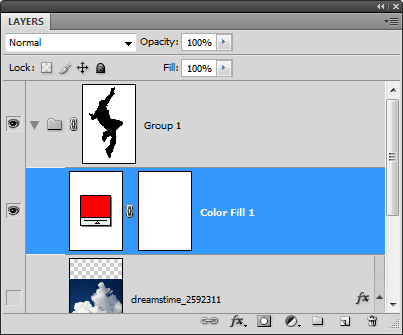
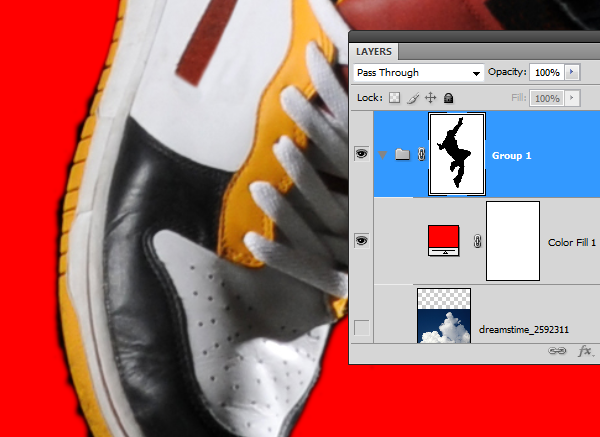
Now we’ll check to see if there are any flaws to the mask. Add a color fill layer with a contrasting color such a red. To do this, select the layer with the clouds then choose Layer > New Fill Layer > Solid Color.
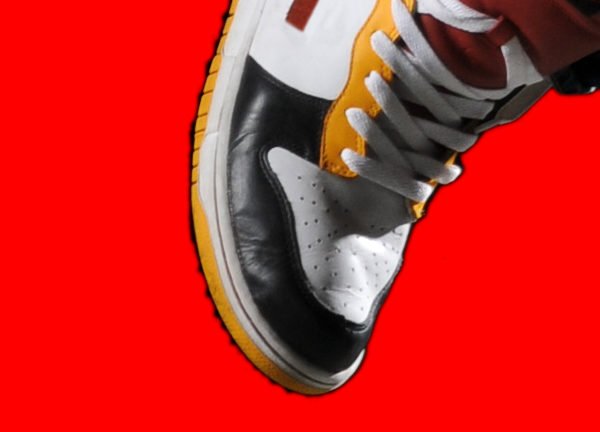
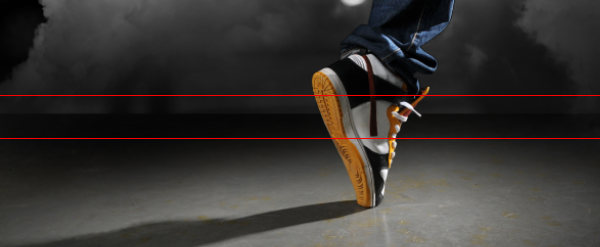
Step 6 – Refine the layer mask
Zoom into 100% view to find any flaws such as this one on the shoe.
Select the layer mask in the layer palette then use the brush and eraser to refine the edges. Use the brush tool to erase the background or the eraser tool to add. In the option bar of the brush and eraser tool, you can change the brush hardness. Use a hardness of 50% or more for sharper edges.
When you’re done refining the mask, you can delete the color fill layer and make the layer with the clouds visible.
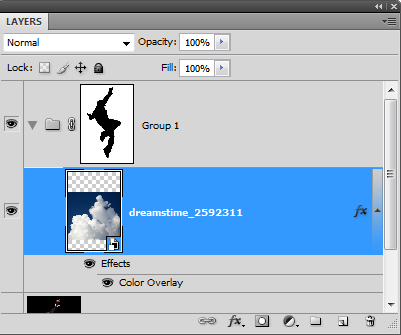
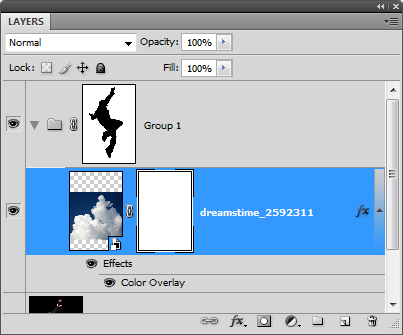
Step 7 – Complete the blending of the clouds
Add a layer mask to the layer with the clouds. To do this, select the layer then choose Layer > Layer Mask > Reveal All.
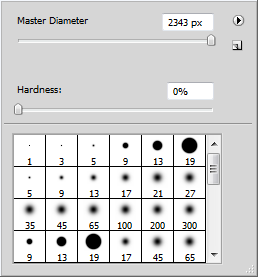
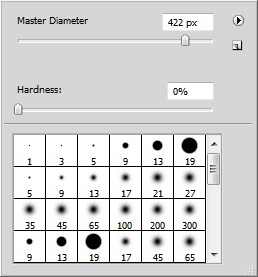
Select the eraser tool. Right click anywhere in the document window to bring up the brush options. Use a very large brush size with a hardness of 0%.
Make sure that the layer mask of the cloud layer is selected. To select the layer mask, click on the layer mask thumbnail in the layers palette. It should have a border around the layer mask to indicate that it is selected. With the eraser tool, erase the bottom of the clouds so that it fades gradually.
Select the move tool then move the clouds lower so that it is just above the spotlight.
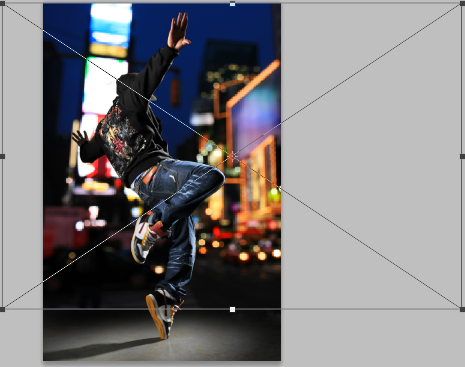
Step 8 - Place the city background
Before you can use the place command, you need to have the layer mask deselected. Click on the layer thumbnail of the clouds layer to deselect the layer mask.
Choose File > Place. Browse for the photo of the city then click OK. Scale and position the image like shown below then press enter on your keyboard to apply the changes.
Move the layer with the city background below the layer with the clouds.
Step 9 – Desaturate the city background
First, we’ll make the layer grayscale using the same technique we used earlier with the clouds layer. Right click on the layer of the city background then choose blending options.
Apply the settings as shown below then click OK.
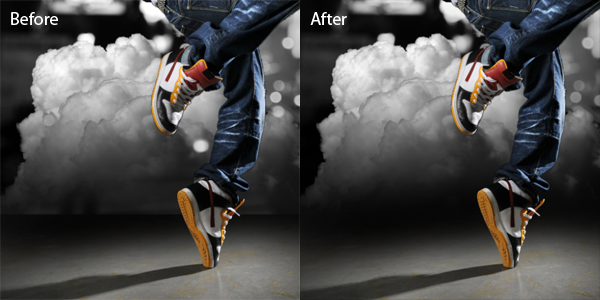
Step 10 – Fade the bottom edge of the layer with the city background
If you look closely at the bottom of the city edge layer there is a hard edge. To fix this, we’ll fade the edge with a layer mask.
With the layer of the city background selected, click on the

to add a layer mask.
Select the eraser tool then right click anywhere in the document window. Use a large brush with a hardness of 0%.
Make sure that your layer mask is selected. It should have a white border around the layer mask thumbnail to indicate that it is selected. With the eraser tool, erase the bottom of the edge so that the hard edge is gone.
Here’s the before and after of fading the bottom edge.
Here’s what our image looks like so far.
Step 11 – Add abstract colors to the background
Create a new layer above the clouds layer then set the blending mode to color. Now we can paint in this layer with any color and it will only affect the color of the layers below.
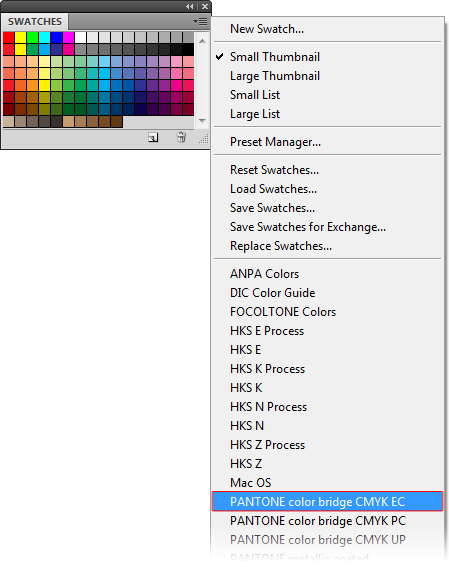
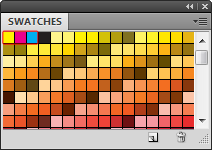
In the swatches palette (Window > Swatches), click on the

menu then choose any one of the PANTONE CMYK swatches.
Now you have the yellow, magenta, and cyan colors easily accessible form your swatches palette.
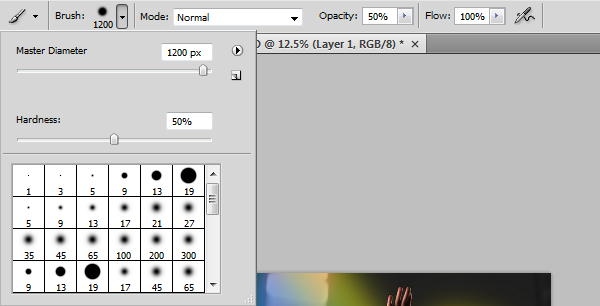
Select the brush tool. On the option bar at the top, you can select the brush size, hardness, and opacity. I recommend starting with a 50% opacity to paint.
Select any of the first three colors in the swatches palette then begin painting.
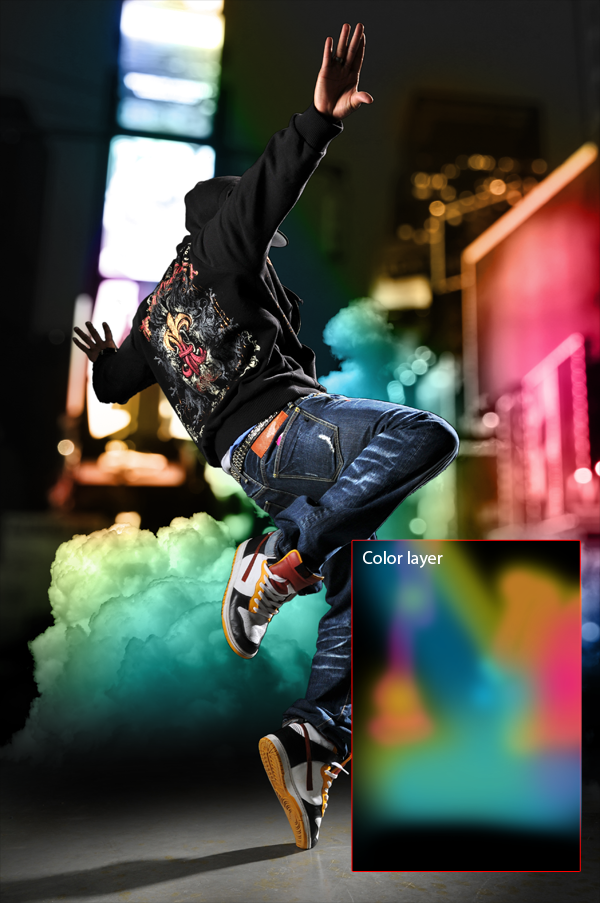
You can overlap two colors to create other colors such as teal. Remember that you can adjust the size, hardness, and opacity of your brush for different results. Here is what we ended up with and how we got the results.
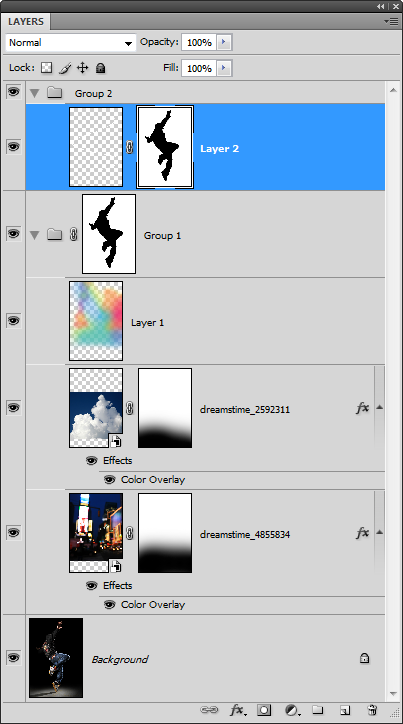
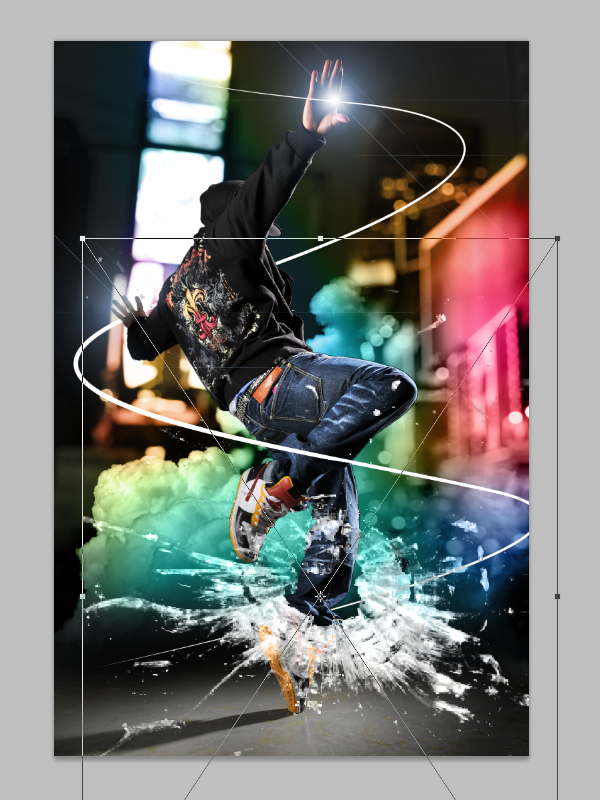
Step 12 – Add a swirling beam of light
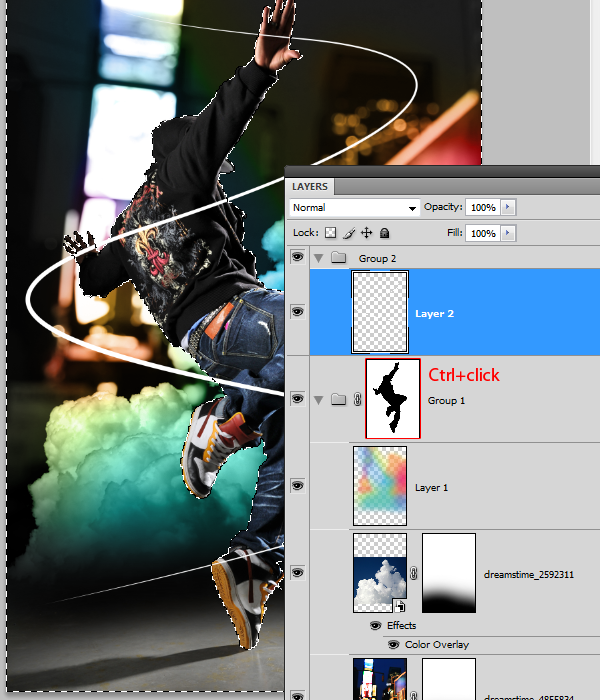
Create a new layer inside a new group. This group will be used to store all the special effects we’ll be adding on later. Select Group 1 then click on the
button to create a new group above it. Then, click on the

button to add a new layer inside Group 2.
Select the pen tool then apply the settings in the option bar as shown in the image below.
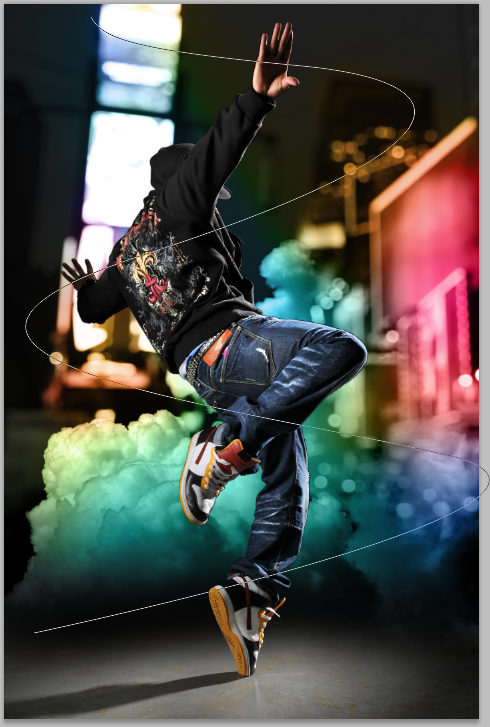
Create a curved path similar to the image below.
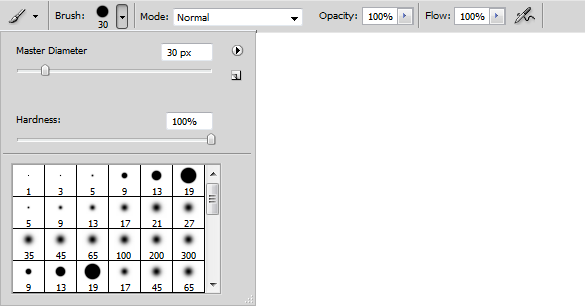
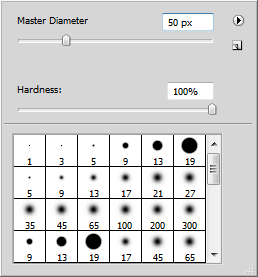
Select the brush tool and adjust the settings. Use the settings as shown below but adjust the master diameter setting to change the size of the brush. The size of this brush will determine the thickness of the beam of light. We used a brush size of 30 px on the high resolution file used for this tutorial. But if you are working on a low resolution file (ex. 800 x 600 pixels), then you should use a smaller brush size such as 7 pixels.
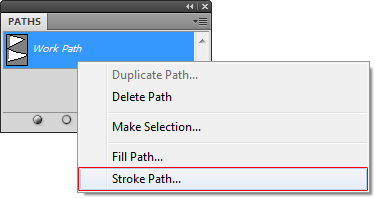
Make sure that you have the new layer in Group 2 selected. In the paths palette (Window > Paths), right click on the work path then choose stroke path.
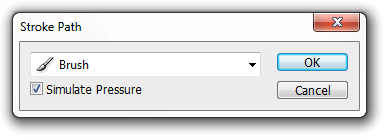
In the stroke path dialog, select brush from the drop down menu and enable simulate pressure.
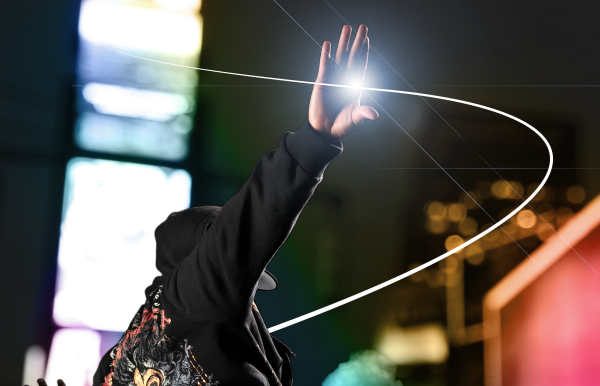
This is what our image looks like so far with the swirling beam of light. However, it doesn’t look like it is swirling around the model. In the next step, we’ll mask out certain areas to make it look like it is swirling around the model.
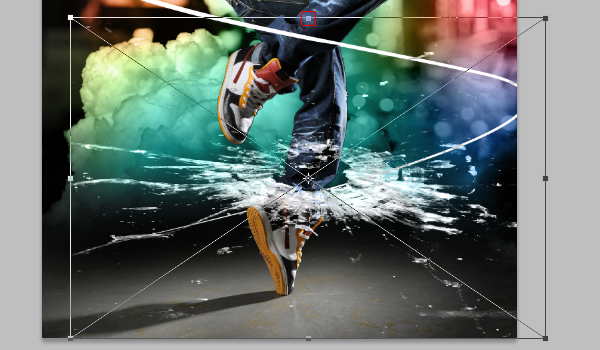
Step 13 – Create a mask for the swirling beam of light
Hold down the Ctrl key on your keyboard then click on the layer mask of group one.
Select the layer with the beam of light then click on the
button to add a layer mask. It should apply the selected area as the layer mask.
Make sure that you have the new layer mask selected. Select the brush tool the paint in white over the areas shown in the image below. This will make the beam of light look like it is swirling around the model.
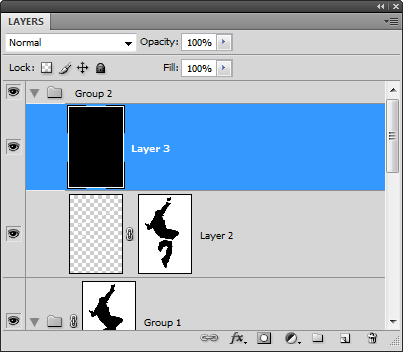
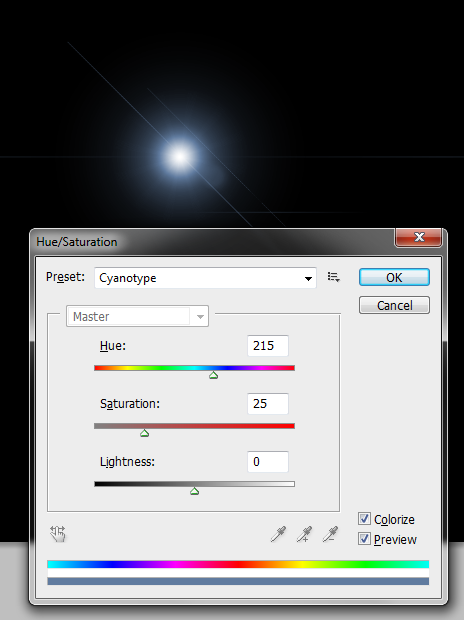
Step 14 – Create a lens flare
Create a new layer as the top layer in Group 2 then fill it with black.
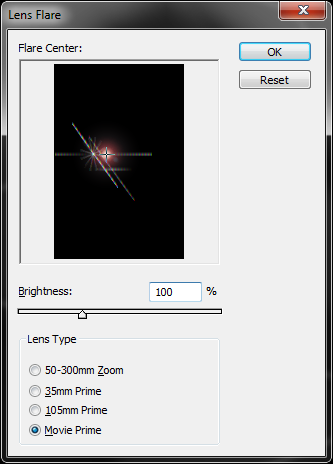
Choose Filter > Render > Lens Flare. Set the brightness to 100% and choose movie prime as the lens type. Adjust the flare center to get a flare that you like then click OK.
Choose Image > Adjustments > Hue/Saturation then apply the settings as shown below. If you are using Photoshop CS3 or older, enable the colorize option first then adjust the hue and saturation settings.
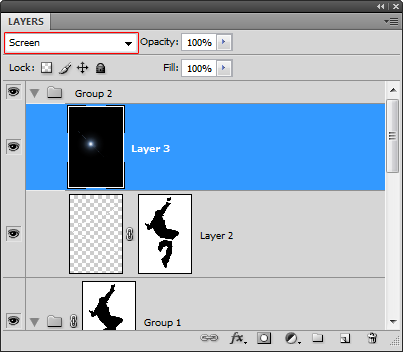
Step 14 – Duplicate and position the lens flare
First, change the blend mode of the lens flare layer to screen.
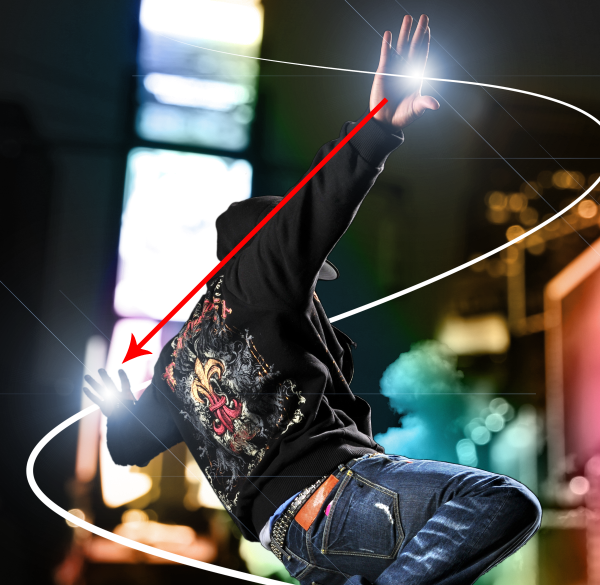
Select the move tool then reposition the lens flare to models right top hand.
While holding down the Alt key on your keyboard, drag the lens flare to the models left hand. This will create a duplicate of the lens flare.
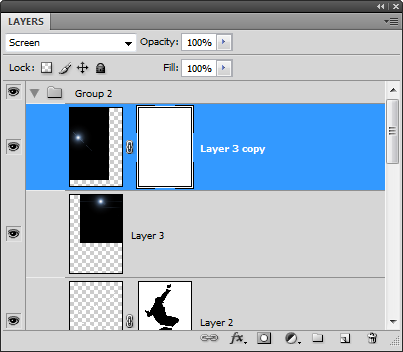
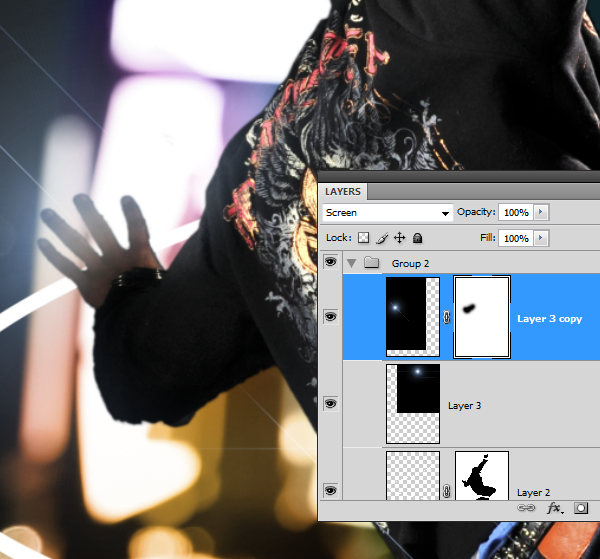
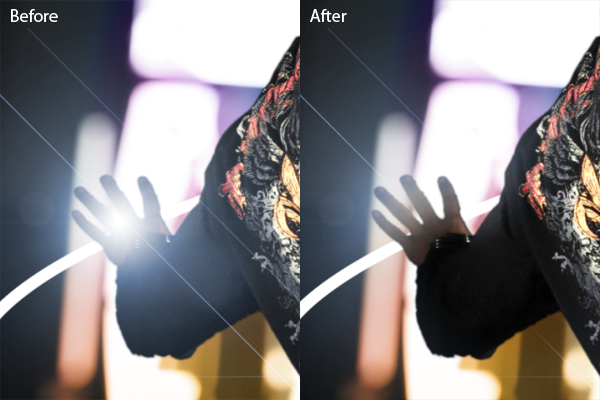
Step 15 – Mask the lens flare
We want to make the second lens flare appear as behind the models hand. To do this, we’ll mask it out using a layer mask. Click on the
button to add a layer mask.
Select the eraser tool then use a large brush with 0% hardness.
Erase over the hand and arm so that the lens flare looks like it is behind the hand.
Here’s the before and after results.
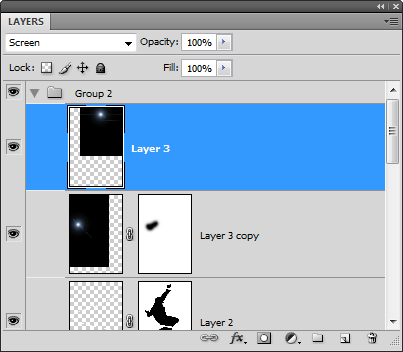
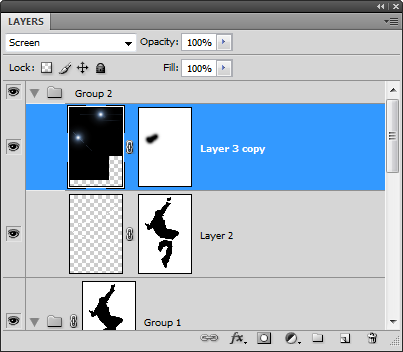
Step 16 – Merge the lens flare layers
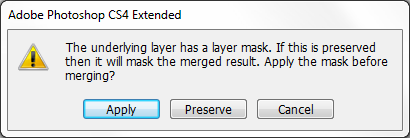
Because we will not need to reposition the lens flare anymore, we can merge them together. If you simply merge the two layers right now, the layer mask will be lost. To preserve the layer mask, move the layer without the layer mask up so that it is on the top. Then, choose Layer > Merge Down or Ctrl+E.
A dialog will appear asking if you want to apply or preserve the layer mask. Select preserve.
Now the two layers are merged and the layer mask is still there.
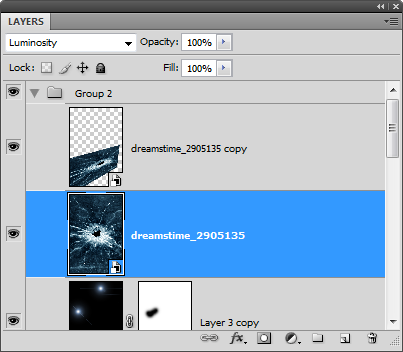
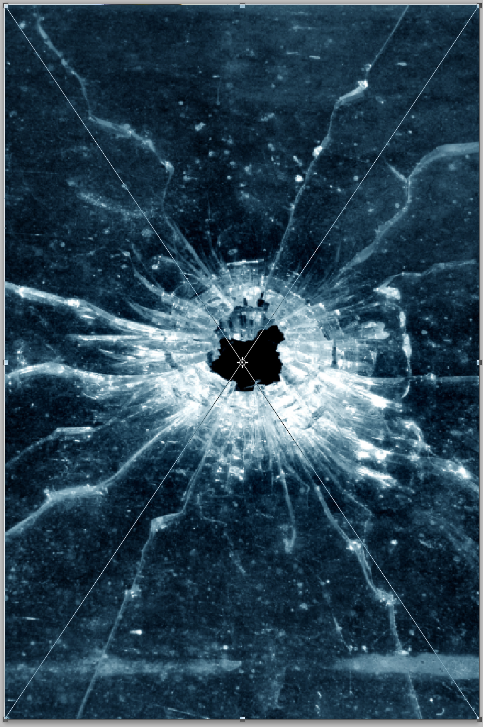
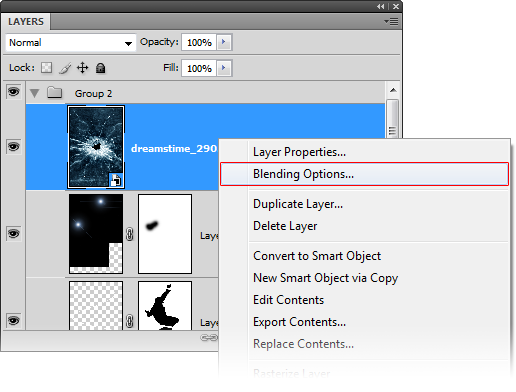
Step 17 – Import the image of the shattered glass
Choose File > Place, browse for the image of the shattered glass, then click OK. Press enter on your keyboard to exit out of the transform tool.
Step 18 – Add transparency to the glass layer
Using the same technique used earlier, we’ll make the dark area of the layer transparent so that it blends into the photo. Right click on the layer with the glass then choose Blending Options.
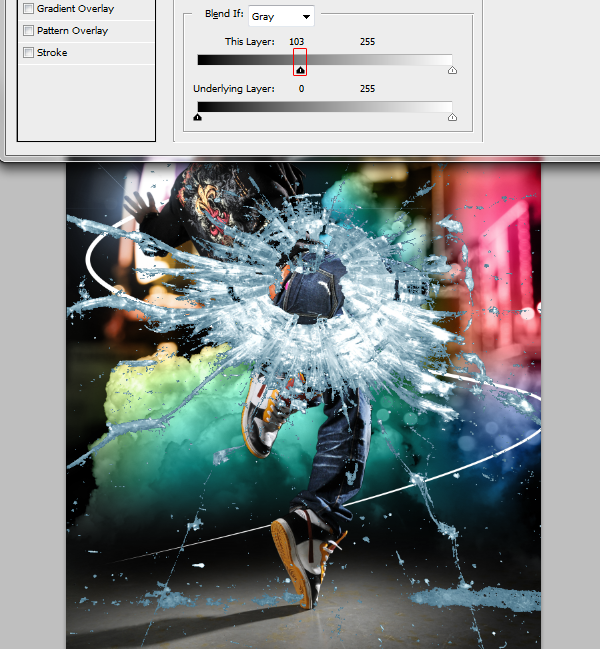
At the bottom of the window in the blend if options, drag the black input sliders towards the right until the background disappears.
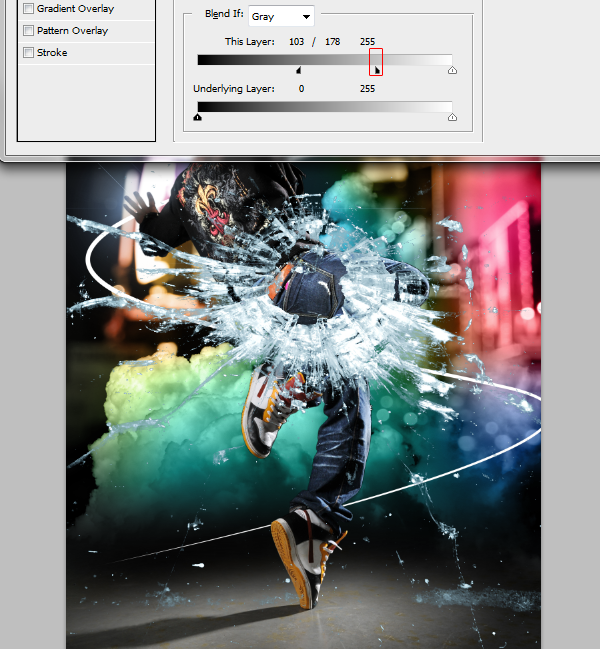
Hold the Alt key on your keyboard then drag the right black input slider towards the right until the edges are softened.
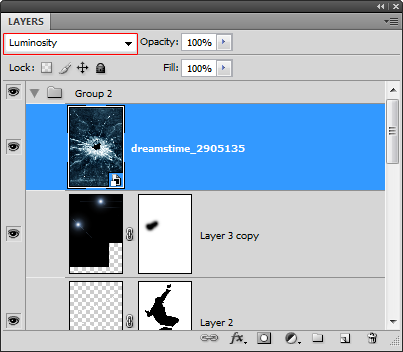
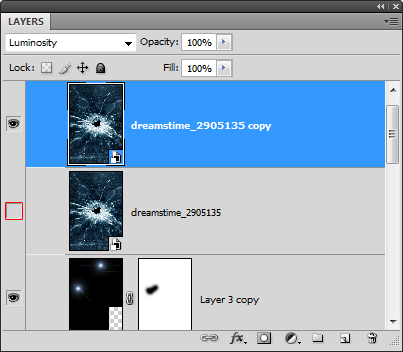
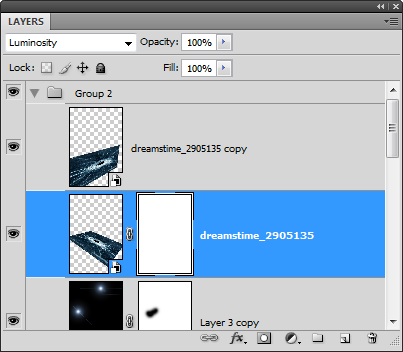
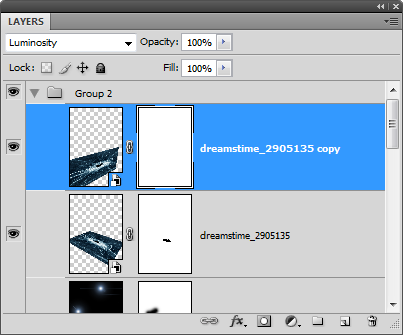
Change the blending mode of the current layer to luminosity. This will allow the color from the layers below to be seen through the glass.
Step 19 – Prepare the layers
Duplicate the layer with the glass (Layer > Duplicate Layer)
Hide the other layer by clicking on the

icon.
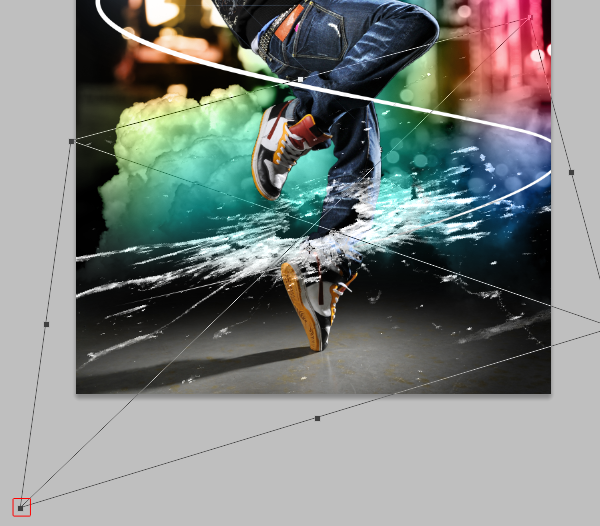
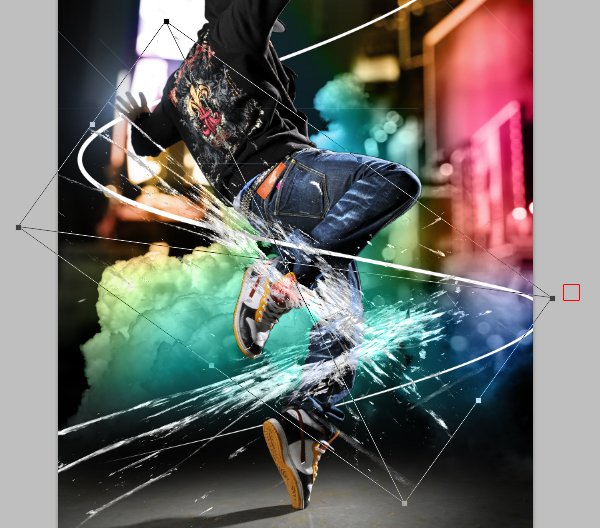
Step 20 – Distort the first glass layer
With the current glass layer selected, choose Edit > Free Transform to use the transform tool. Hold down your left mouse button anywhere inside the boundary border then drag it to the models left ankle.
While holding down the Alt key on your keyboard, drag the upper middle handle downwards so that your shattered glass looks like the image below.
Rotate the layer like shown below. To rotate, position your cursor outside the bounding border then drag to rotate.
While holding down the Ctrl key on your keyboard, drag the bottom left handle towards the bottom left like shown below.
While holding down the Ctrl key, drag the bottom right handle towards the upper left like shown below. Press enter on your keyboard to apply the changes.
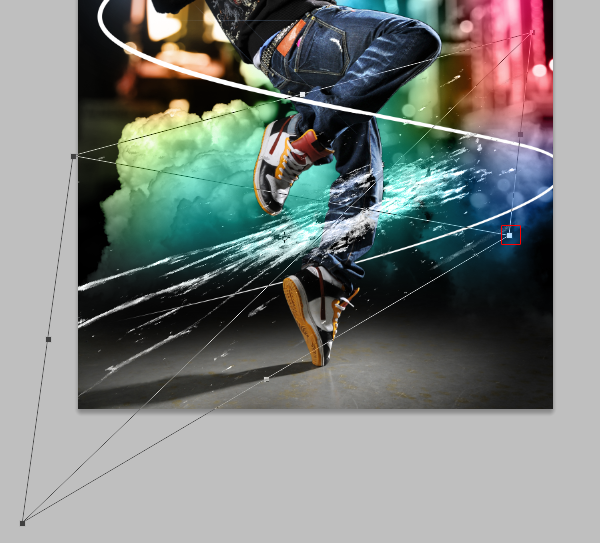
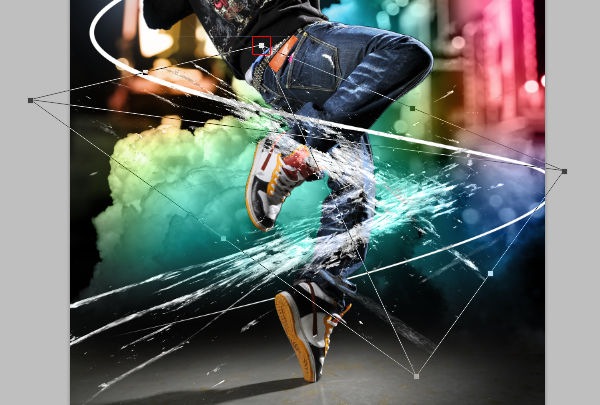
Step 21 – Distort the second glass layer
Select the other shattered glass layer then enable back the visibility by clicking where the
icon should be.
Like before, we’ll use the transform tool to distort the layer. Choose Edit > Free Transform then position the center of the shattered glass at the models other ankle.
While holding down the alt key, drag the upper middle handle towards the bottom to shrink the layer like shown in the image below.
Rotate the layer like shown below by clicking anywhere outside the boundary border and dragging.
While holding down the Ctrl key on your keyboard, drag the top left corner downwards. Press enter on your keyboard to apply the changes.
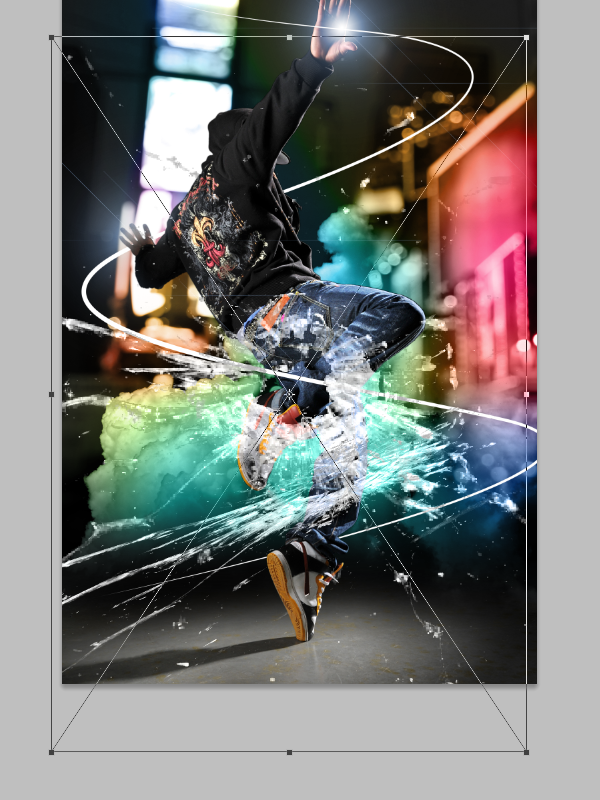
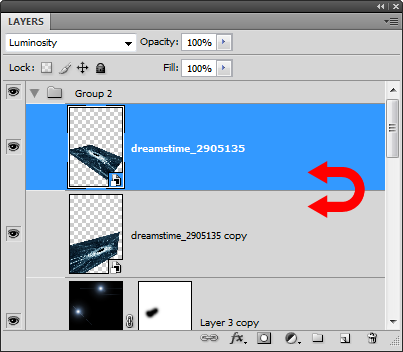
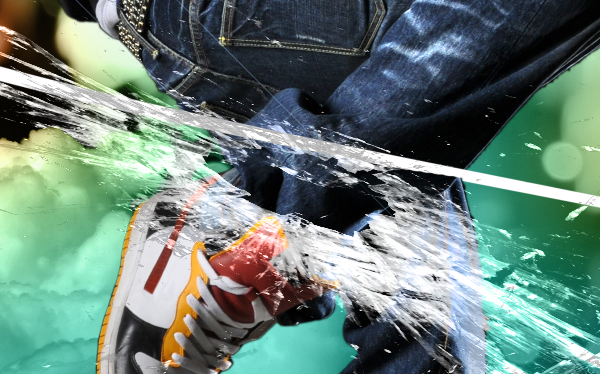
Step 22 – Swap the layers
Switch the position of the two shattered glass layers. Move the bottom one above the top one. This is because the shattered glass on the models left ankle is supposed to appear in front of his left ankle.
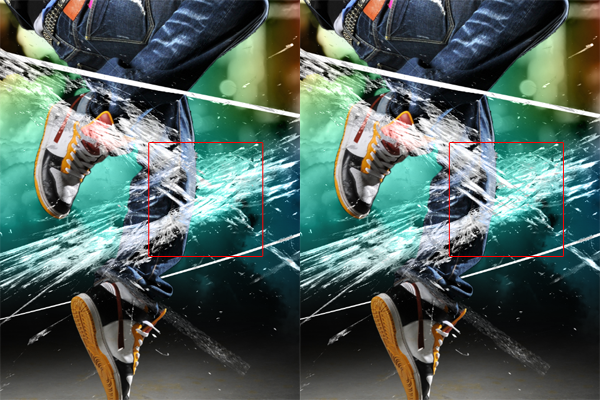
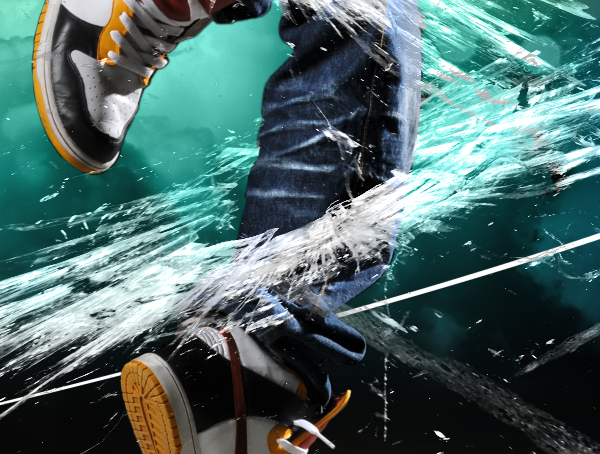
Here’s a before and after comparison of switching the layers. You can see that the shattered glass doesn’t appear to be wrapping around the models legs. We’ll fix this with a layer mask in the next step.
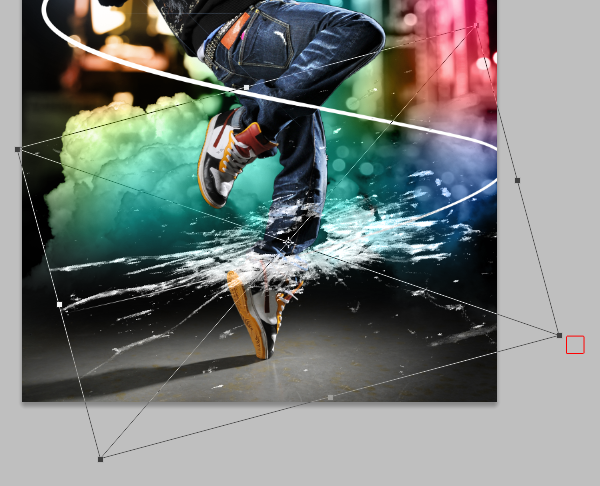
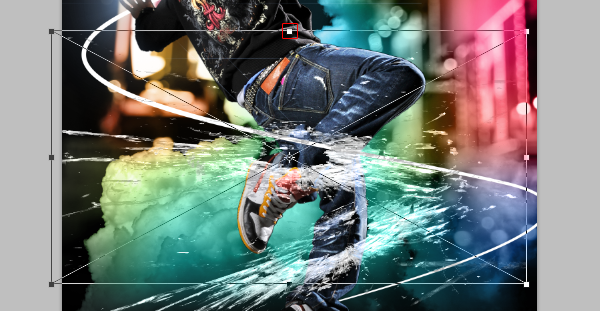
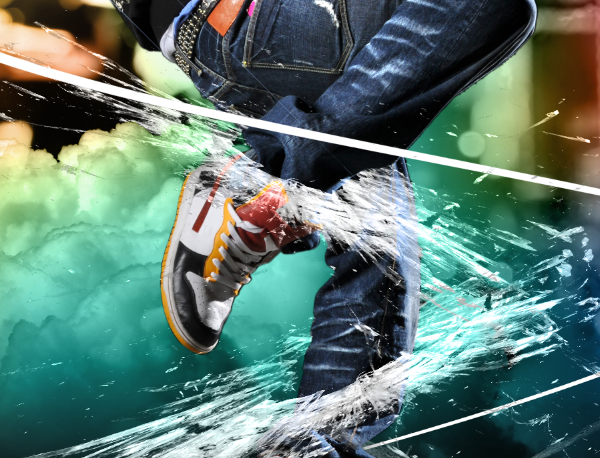
Step 23 – Add masks to the shattered glass layers
Select the second layer with the shattered glass then click on the
button to add a layer mask.
Zoom in to 100% and use the move tool to position the center of the shattered glass on the leg.
Select the eraser tool, right click anywhere in the document window, then set the hardness to 100%.
Erase the upper part of the shattered glass that touches the leg and the beam of light like shown below. Now it looks like the shattered glass is wrapped around the leg but not in front of the beam of light.
We’ll repeat this for the other leg. Select the other layer then click on the
to add a layer mask.
Like before, erase the upper area of the shattered glass that touches the leg as shown below.
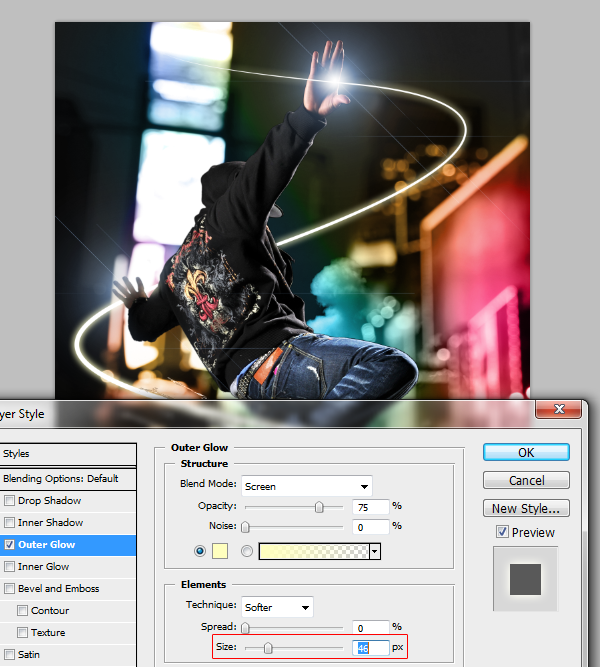
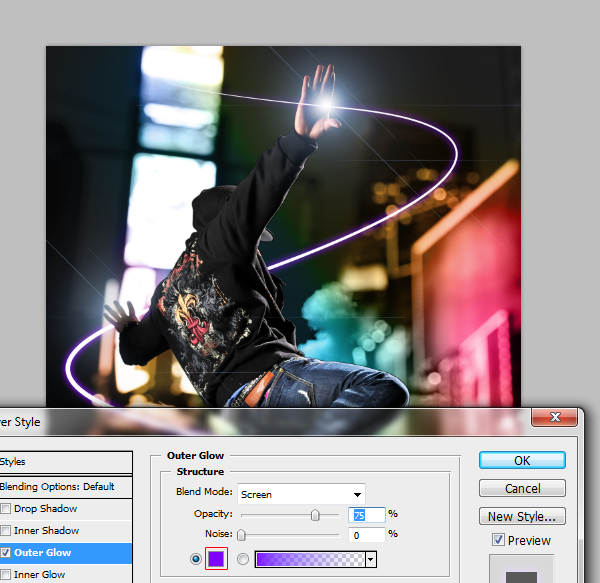
Step 24 – Make the beam of light glow
To finish this photo manipulation, we’ll make the swirling beam of light glow. Right click on the layer with the beam of light then choose blending options.
Select the outer glow layer style then adjust the size until you see a glow on the beam of light.
Select a color that you like for the glow.
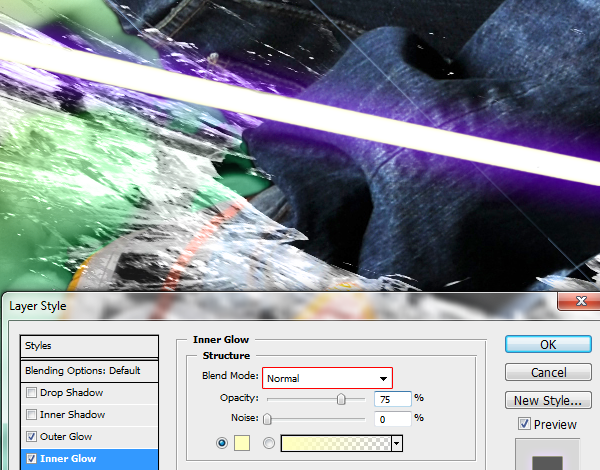
Next, enable the inner glow layer style and zoom in so that you can see the beam of light. Press Ctrl+ to zoom in and drag in the document window to reposition. Set the blend mode to normal.
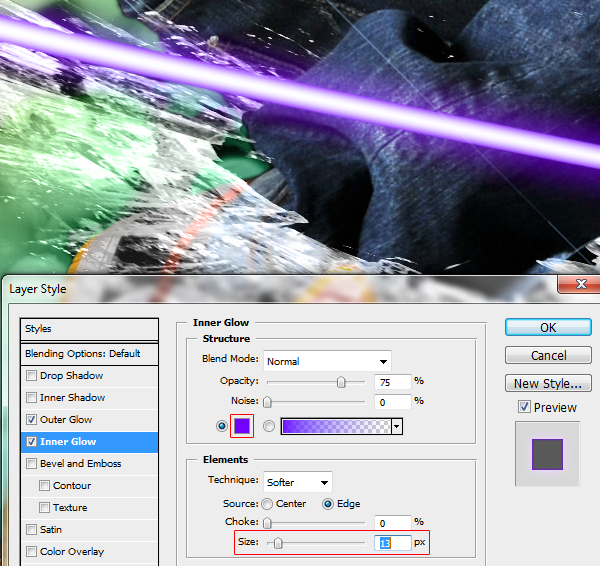
Set the color to the same or similar color you used in your outer glow layer style then adjust the size so that the inner glow is more visible.
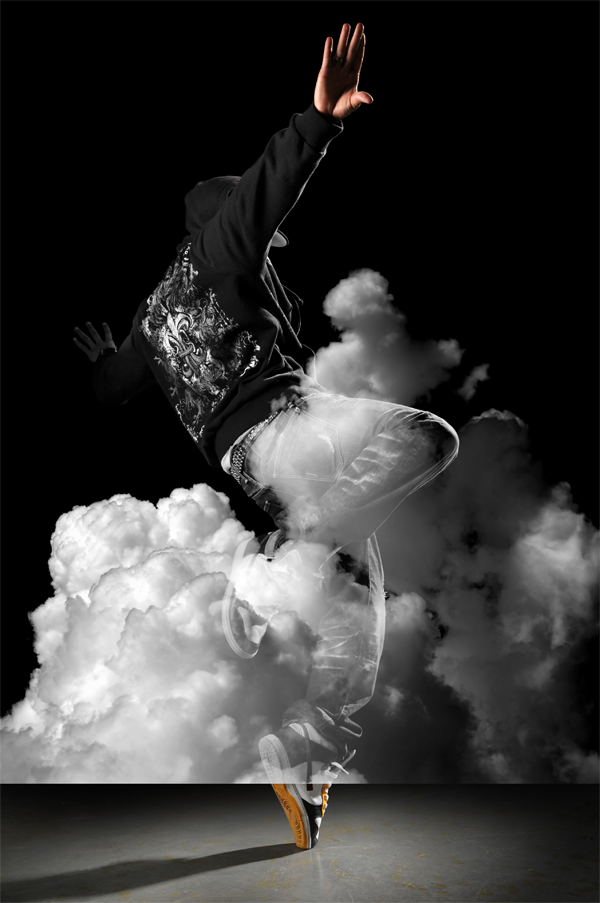
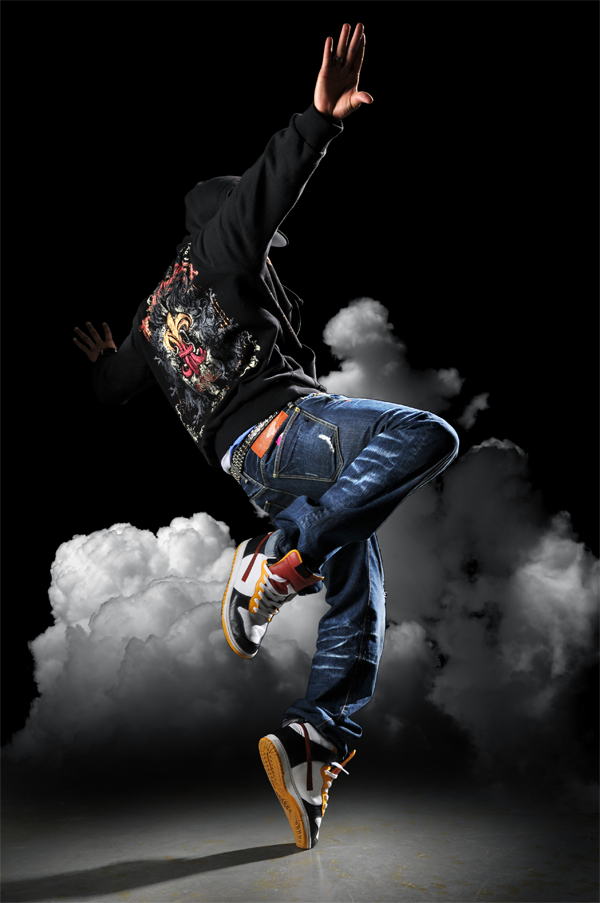
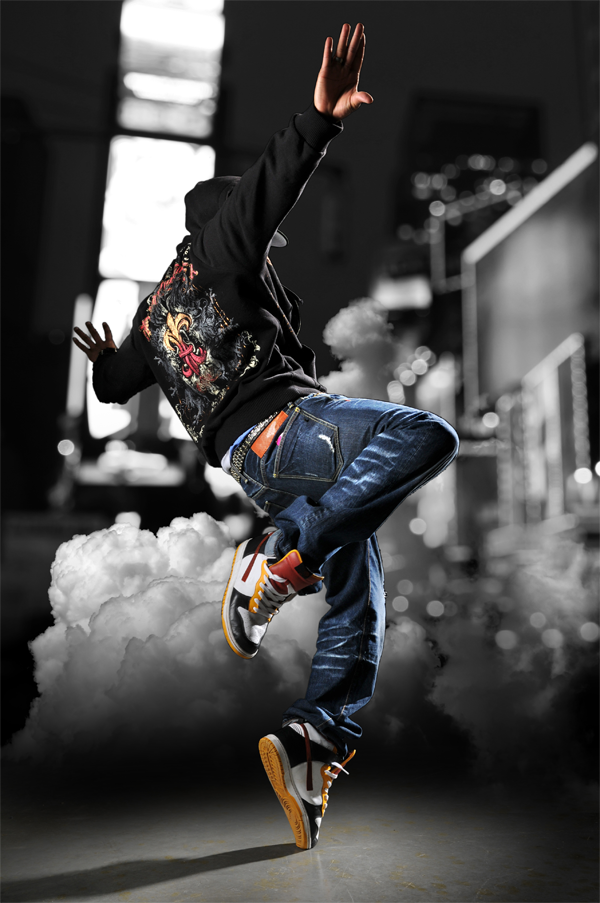
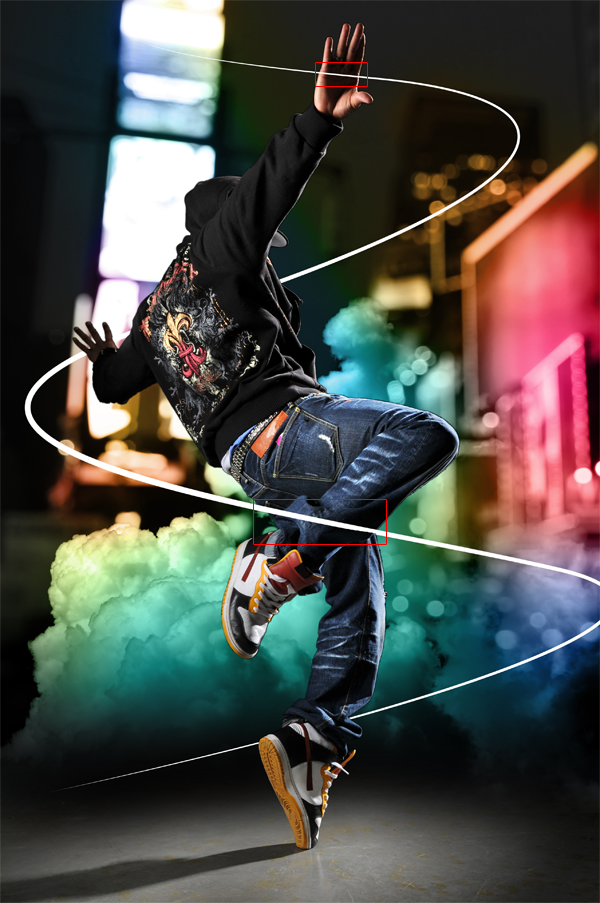
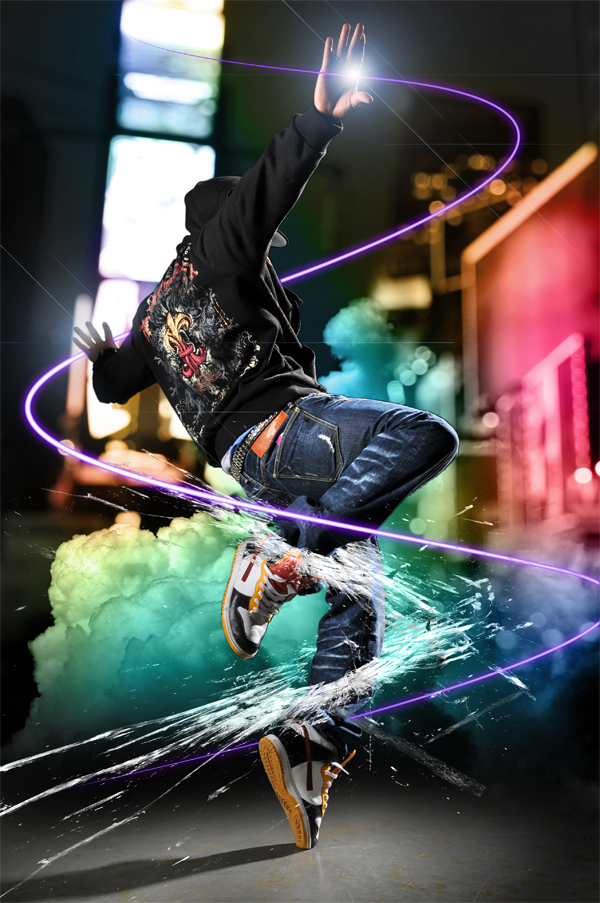
Final Results


Tidak ada komentar:
Posting Komentar