- Program: Adobe Photoshop CS or newer version
- Difficulty: Medium
- Estimated Completion Time: 1 to 2 hours
Step 1 – Extracting the Model
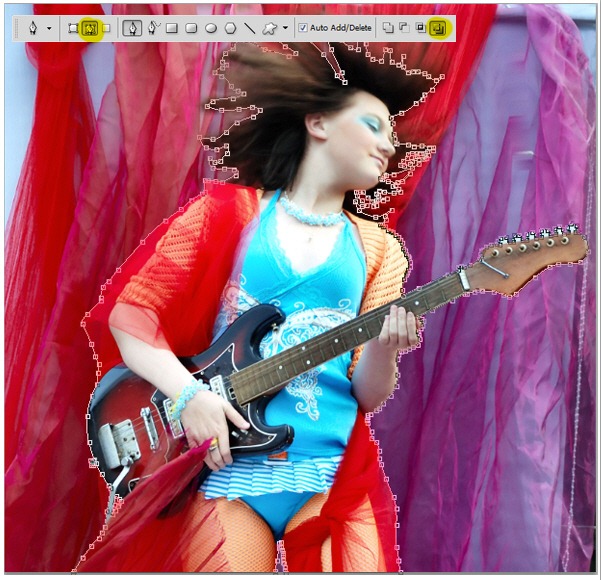
Open the stock model image then extract this model using combination of selection path and quick mask. However, if you already familiar with this kind of selection, you can jump to step 2. First, use Pen tool then make sure shape layers is ON and Exclude Overlapping Shape area option is selected. Create selection paths around model's body. I encourage you to zoom in ( around 200% ) when doing this, so you can get more detailed selection paths.
Note: this stock is belongs to
Janet Goulden, do not redistribute or sell this image without permission! thanks :)
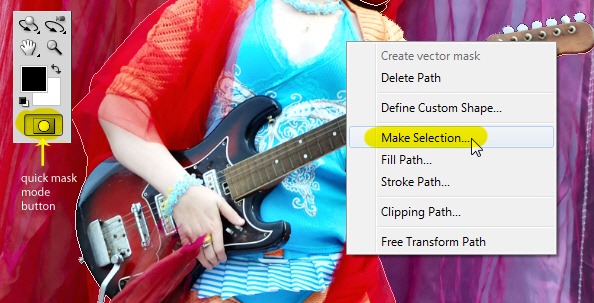
When you're done selecting, right-click using Pen tool to show popup menu. Choose Make Selection then click OK on the make selection dialog box appear next. After the selection marquee appear, click Quick Mask button in the toolbar to change editing mode to Quick Mask ( you can simply press Q on your keyboard to change editing mode from normal to quick mask mode ).
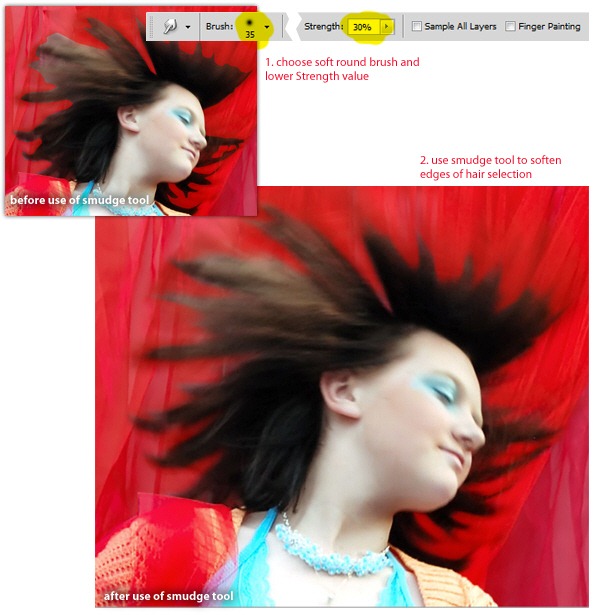
In Quick Mask mode, unselected area is highlighted with red. Use soft round Smudge tool with Strength: 30% to soften edges of hair selection.
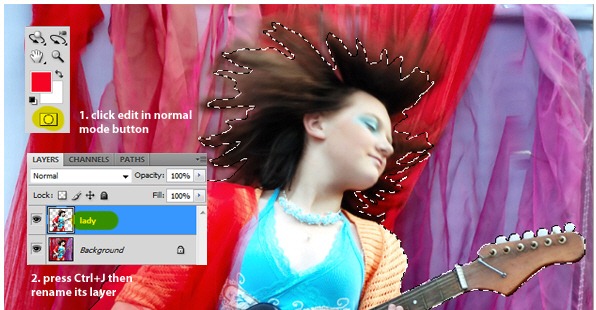
Click Edit in normal mode button ( or simply press Q again ), now with the selection marquee visible again, press Ctrl+J to duplicate selected model on a new layer. Rename this layer, "lady".
Step 2 - Creating Flowery Pattern for Background
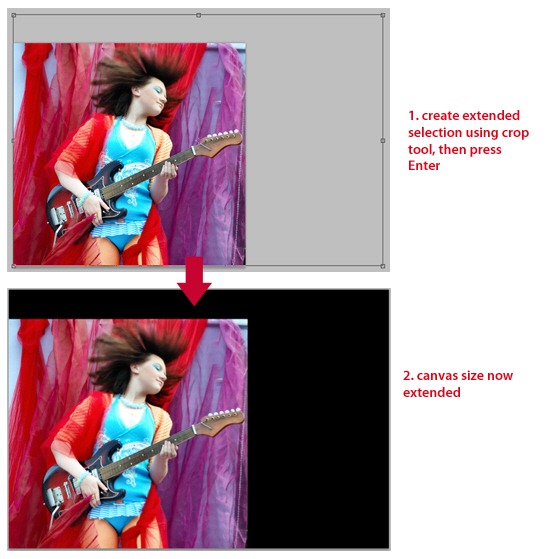
We need bigger space for background, so get the Crop tool and create extended selection like this one below. When done selecting, hit Enter to extend your canvas.
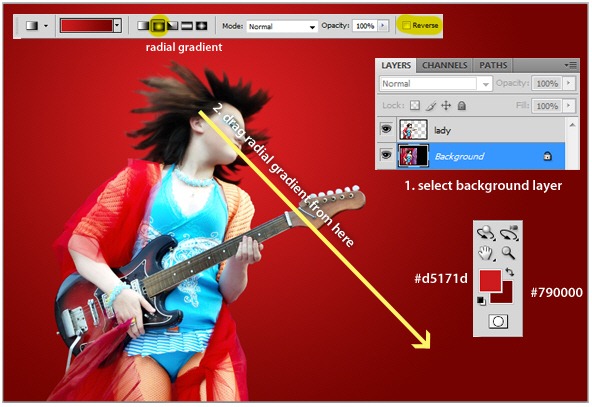
Use radial Gradient tool with combination color of light and darker red ( you can see the RGB color code in the screenshot below ). Make sure you have selected the background layer then draw the gradient.
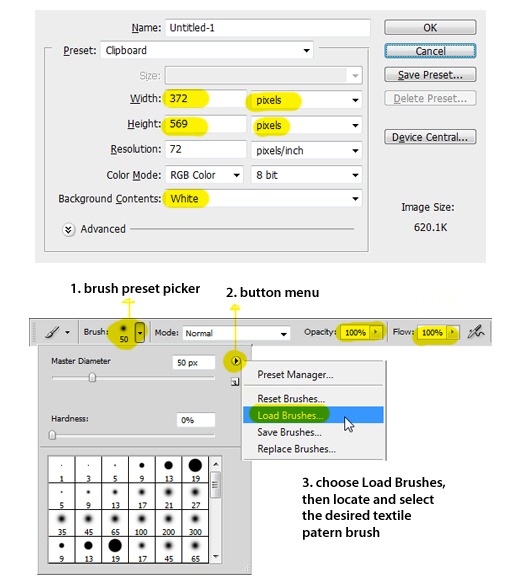
Create new document ( press Ctrl+N ), adjust width and height value to 372x569 px then make sure to select white as background color. Click Ok. Now use Brush tool and load
textile pattern brush. If you don’t know how to load brush, see explanation in the screenshot below.
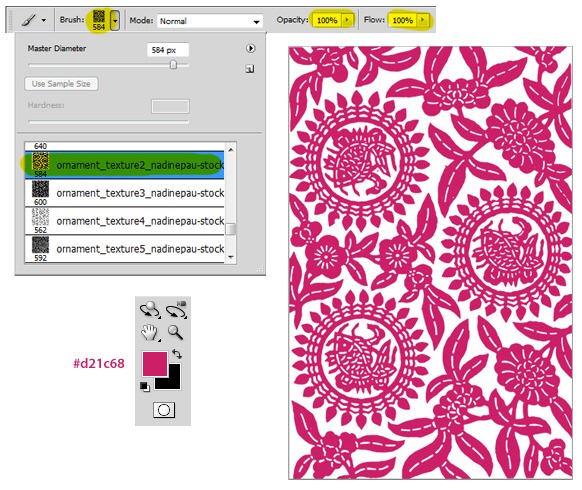
After loading the custom brush, you can now pick one of the brush. In this case, I used the ornament_texture2 brush. Select pink/magenta as the brush color's, then click on the newly created document to make the pattern ( just one click ).
Save this document as a pattern by going to Edit > Define Pattern menu. Give it a proper name (mine is flowery) then back to lady rocker document and create a new layer between background and lady layer's.
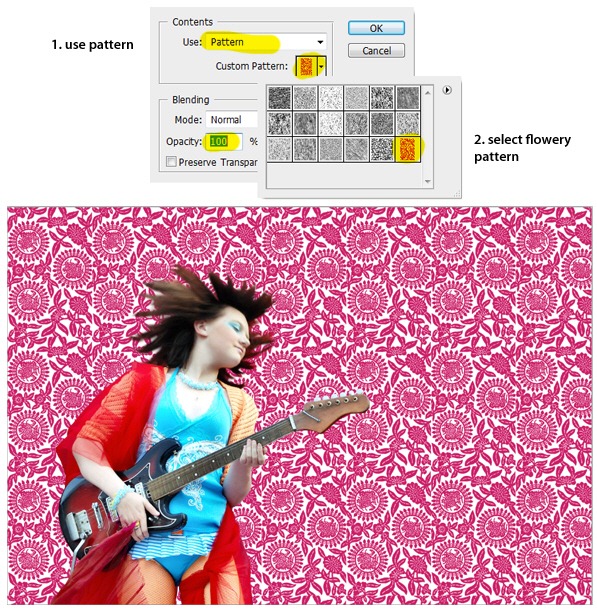
With the flowery layer's selected, go to Edit > Fill menu (or simply press Shift+F5). In the Fill dialog, use Pattern as fill then select the flowery pattern. Make sure Opacity is set 100%, and now you can click OK. *Tadaa*.. your background now covered with flowery pattern!
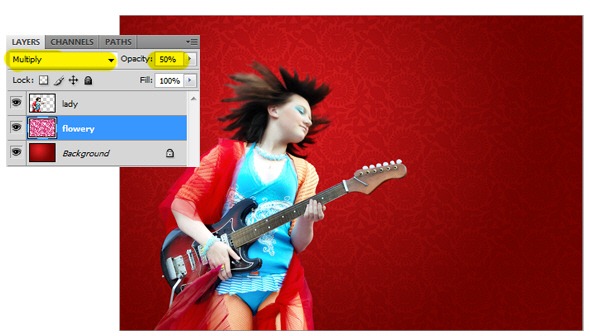
On the flowery layer, change the blend mode to Multiply then lower the opacity to 50%. The pattern should blend nicely with the gradient now.

Tidak ada komentar:
Posting Komentar